Local Deployment
AgentWeave Local Deployment lets you run the whole AgentWeave platform on your own machine or server — your data, your models, and your compute stay under your control. You install it once with the AgentWeave Deployer, point it at a model provider, and then create and use agents from a private portal.
1. Overview & core use cases
A local deployment is a self-contained AgentWeave instance (backend, agent runtime, database, object storage, and login) running in Docker on hardware you own. Once it is up, it supports three main use cases:
- Run your own agents on your own model and compute. Plug in any OpenAI-compatible model provider during install, then import and run agents entirely inside your local deployment. Nothing leaves your network. → Use case 1
- Link to the external agents you already use. Register a lightweight Web-redirect Agent that appears in your portal but opens an external site when clicked — a one-click shortcut to an agent hosted elsewhere. → Use case 2
- Reach your local compute through the cloud. Bind a cloud AgentWeave agent to your local deployment over a secure edge tunnel. You (or your users) chat with the agent on the public cloud, while the request is served by your local deployment's own compute. → Use case 3
Sections 3–5 cover each use case end to end (how to create the agent and how to use it). First, install the platform.
2. Install and configure AgentWeave
Installation is driven by the AgentWeave Deployer desktop app. It walks through four steps shown in its left nav rail — Bundle → Environment → Install → Status.
2.1 Download
Download the AgentWeave Deployer and the Local Bundle from the AgentWeave local deployment download page.
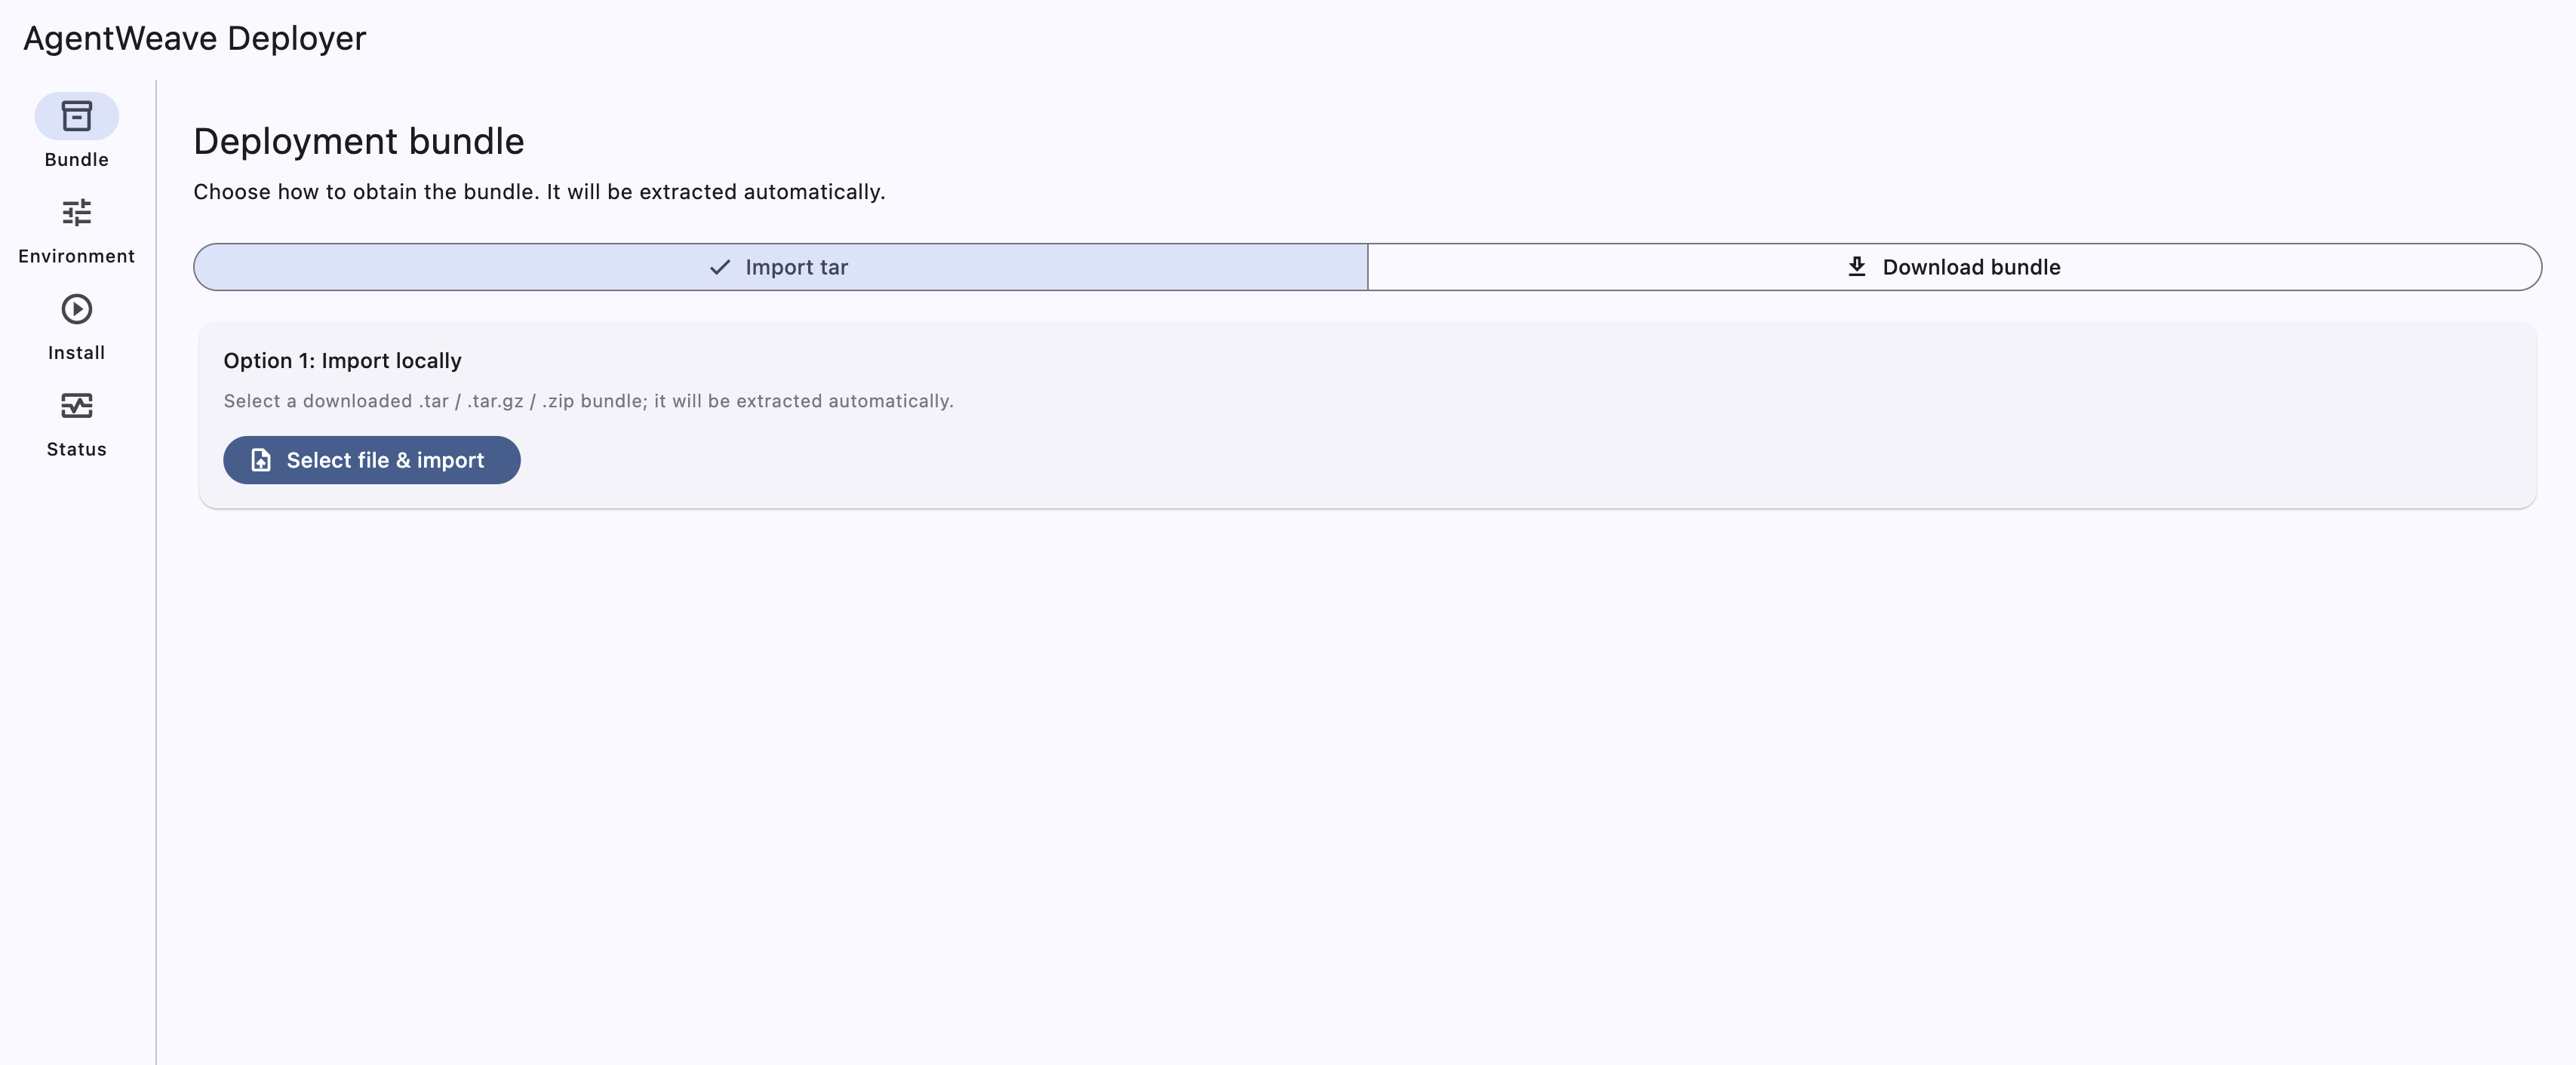
2.2 Import the deployment bundle (Bundle)
Open the Deployer, go to the Bundle step, and select the downloaded bundle to import. It is extracted automatically. The bundle contains everything the install needs — env_local.sh, docker-compose.yml, the install script, and the container images. An optional Docling document-processing add-on can be imported here too.
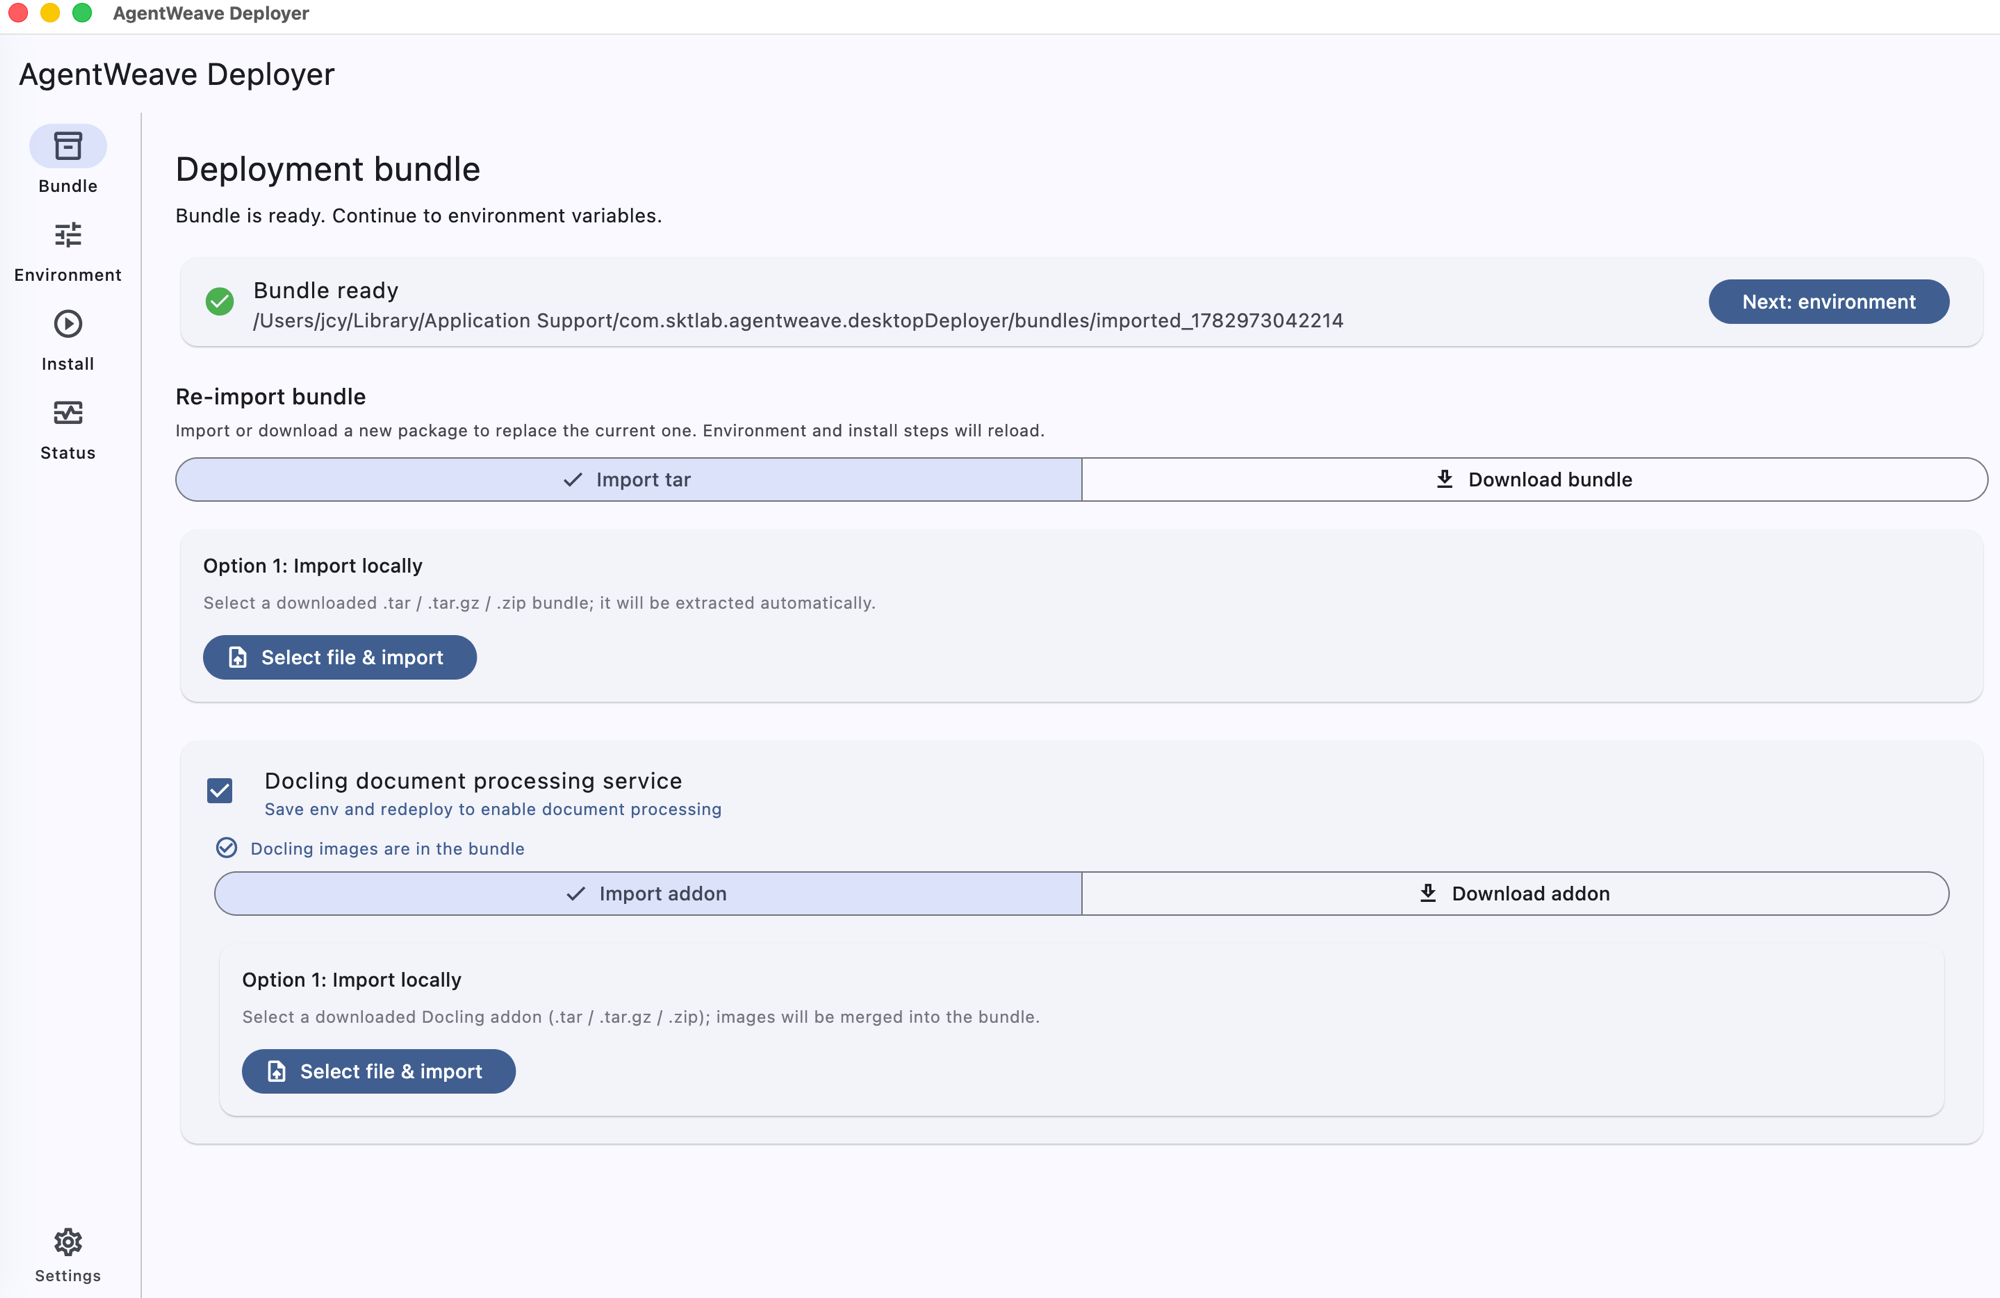
2.3 Configure environment variables (Environment)
On the Environment step, the Deployer edits an env_local.sh file inside the bundle (its path is shown at the top). Settings are grouped into collapsible sections; only the "AI models" group is required — everything else ships with working defaults.
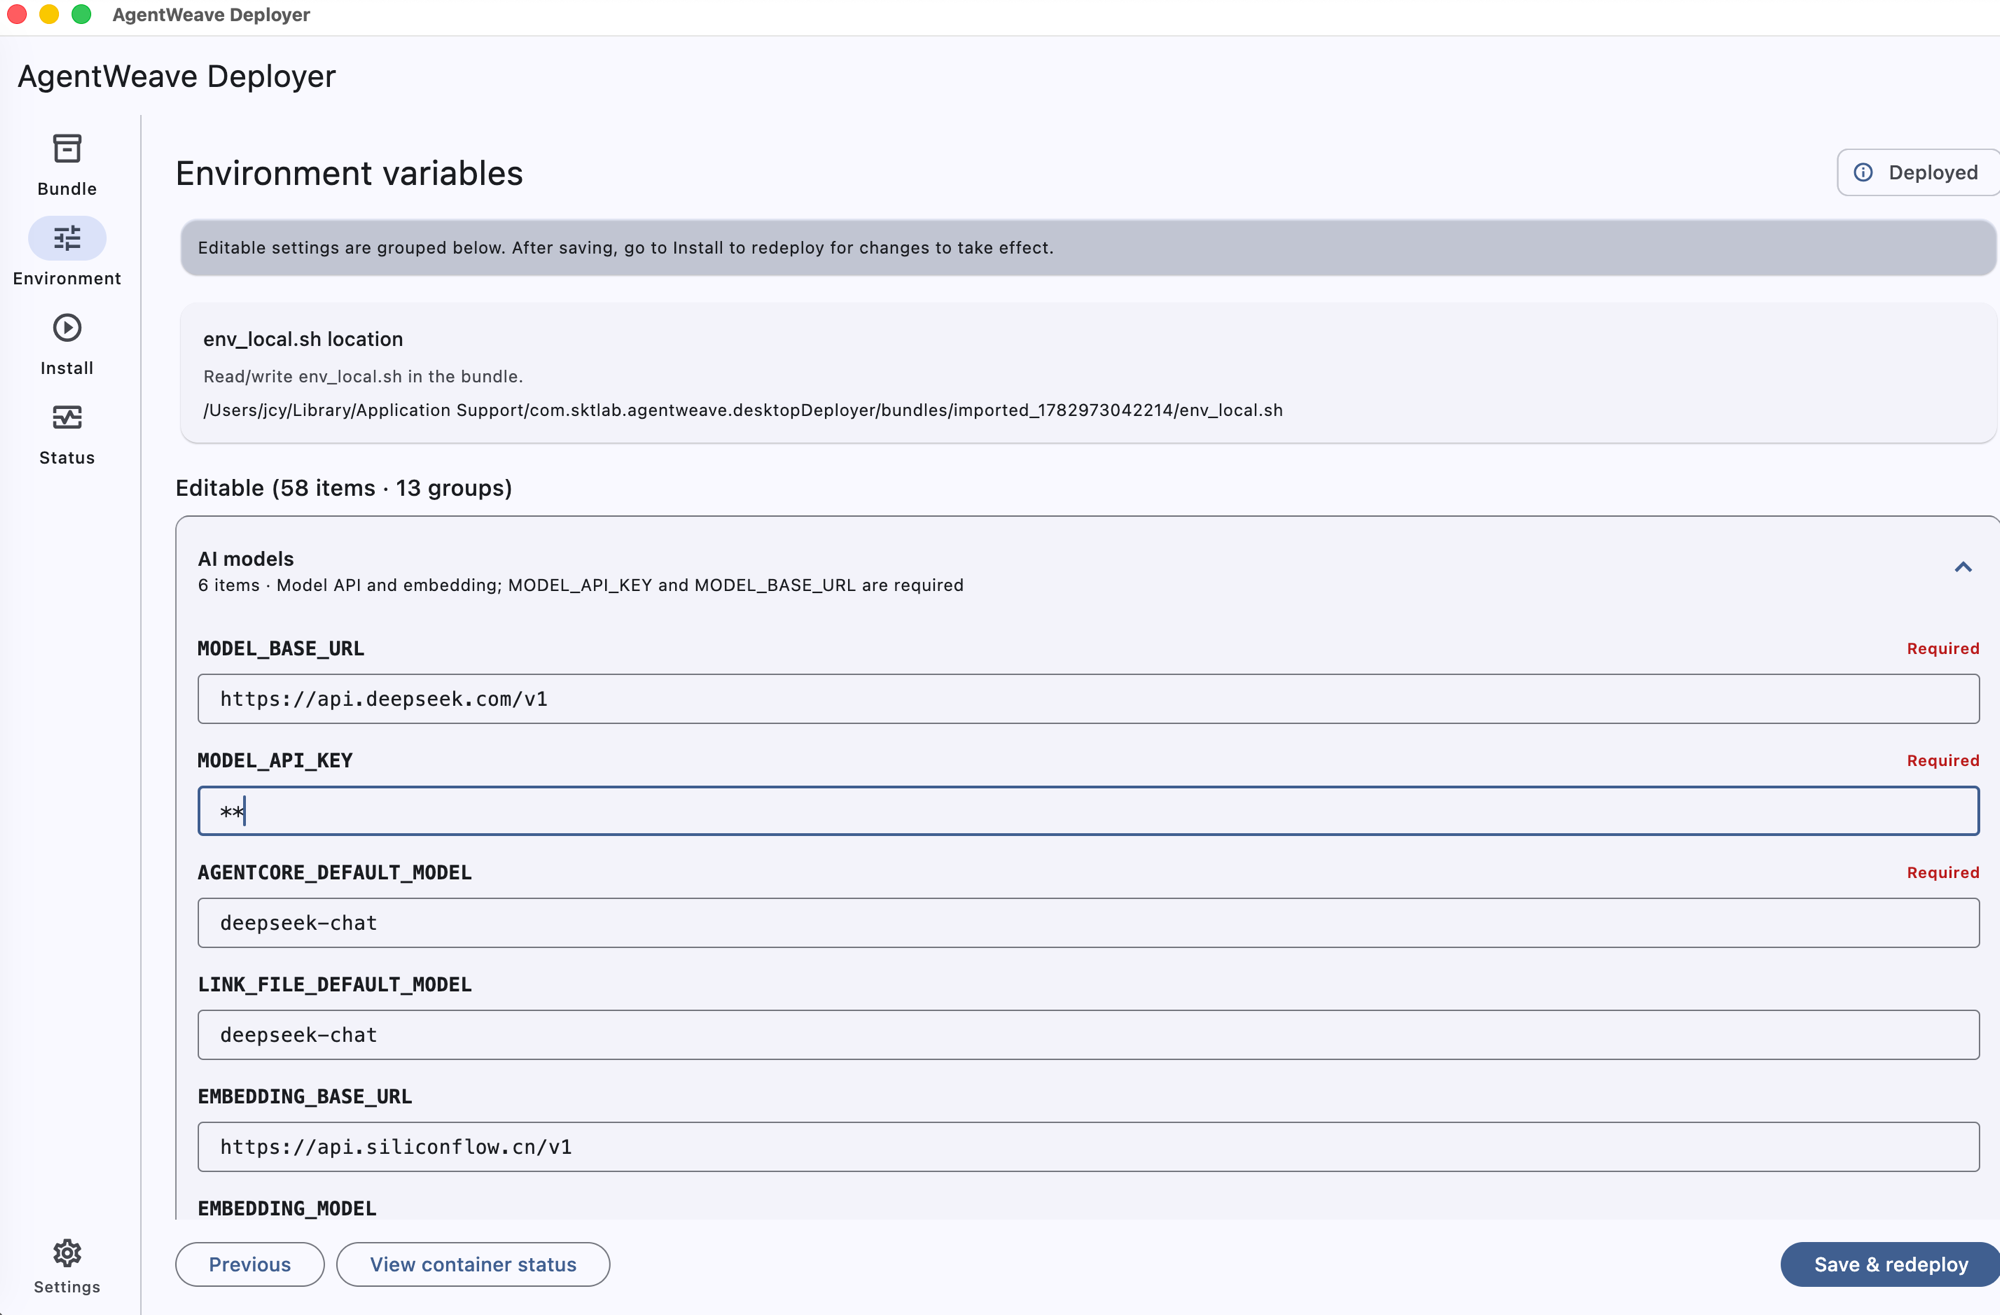
AI models (required)
This group tells your deployment which model provider to call. The provider is OpenAI-compatible and vendor-neutral — point it at DeepSeek, OpenAI, a self-hosted endpoint, or any compatible service. MODEL_API_KEY and MODEL_BASE_URL are required, and AGENTCORE_DEFAULT_MODEL must name a model the provider offers.
| Field (as shown in the UI) | Required | Default | What it does |
|---|---|---|---|
| MODEL_BASE_URL | Yes | https://api.deepseek.com/v1 | The OpenAI-compatible base URL your agents' chat requests are forwarded to. |
| MODEL_API_KEY | Yes | (empty) | The API key sent to your model provider — the bearer token for the endpoint MODEL_BASE_URL points at (e.g. your DeepSeek or OpenAI key). |
| AGENTCORE_DEFAULT_MODEL | Yes | deepseek-chat | The default model id requested from the provider (e.g. deepseek-chat, gpt-4o, claude-sonnet-4-5-…). |
| LINK_FILE_DEFAULT_MODEL | No | deepseek-chat | Fallback model used to extract metadata from uploaded files when an agent has no model of its own. |
| EMBEDDING_BASE_URL | No | https://api.siliconflow.cn/v1 | OpenAI-compatible embeddings endpoint used for knowledge/RAG features. |
| EMBEDDING_MODEL | No | bge-m3 | The embedding model id requested from the embeddings endpoint. |
How the key / base URL / model work together. Your agents run through a proxy that converts their requests into standard OpenAI Chat Completions and forwards them to
MODEL_BASE_URL, authenticating withMODEL_API_KEYand requestingAGENTCORE_DEFAULT_MODEL. To switch providers you only change these three values — no other setup. (The embeddings endpoint's key, when needed, lives in the separate Embedding group.)
Other groups (safe defaults)
The remaining groups can be left untouched for a first install. The ones you may want to review:
| Group | Purpose | What you might change |
|---|---|---|
| Passwords & secrets | Credentials for the bundled services | For production, set a strong DEPLOY_PASSWORD (shared by Postgres/Redis/MinIO/Keycloak admin), INTERNAL_SERVICE_TOKEN, and KEYCLOAK_ADMIN_CLIENT_SECRET. |
| MinIO / object storage | Local file storage | S3_PUBLIC_URL must be reachable from users' browsers (e.g. http://<server-ip>:30900). |
| External ports | Host port mappings | The *_NODEPORT values (backend 30300, Keycloak 30080, MinIO 30900/30901, AgentCore 30800). |
| PostgreSQL / Keycloak / Backend / Proxy / Embedding / AgentCore | Backing-service wiring | Usually leave as-is. |
| Fixed settings (read-only) | Namespace, CPU/memory/storage/replica limits | Read-only — leave unchanged. |
After editing, click Save & redeploy (this writes env_local.sh), then continue to Install.
2.4 Install Docker
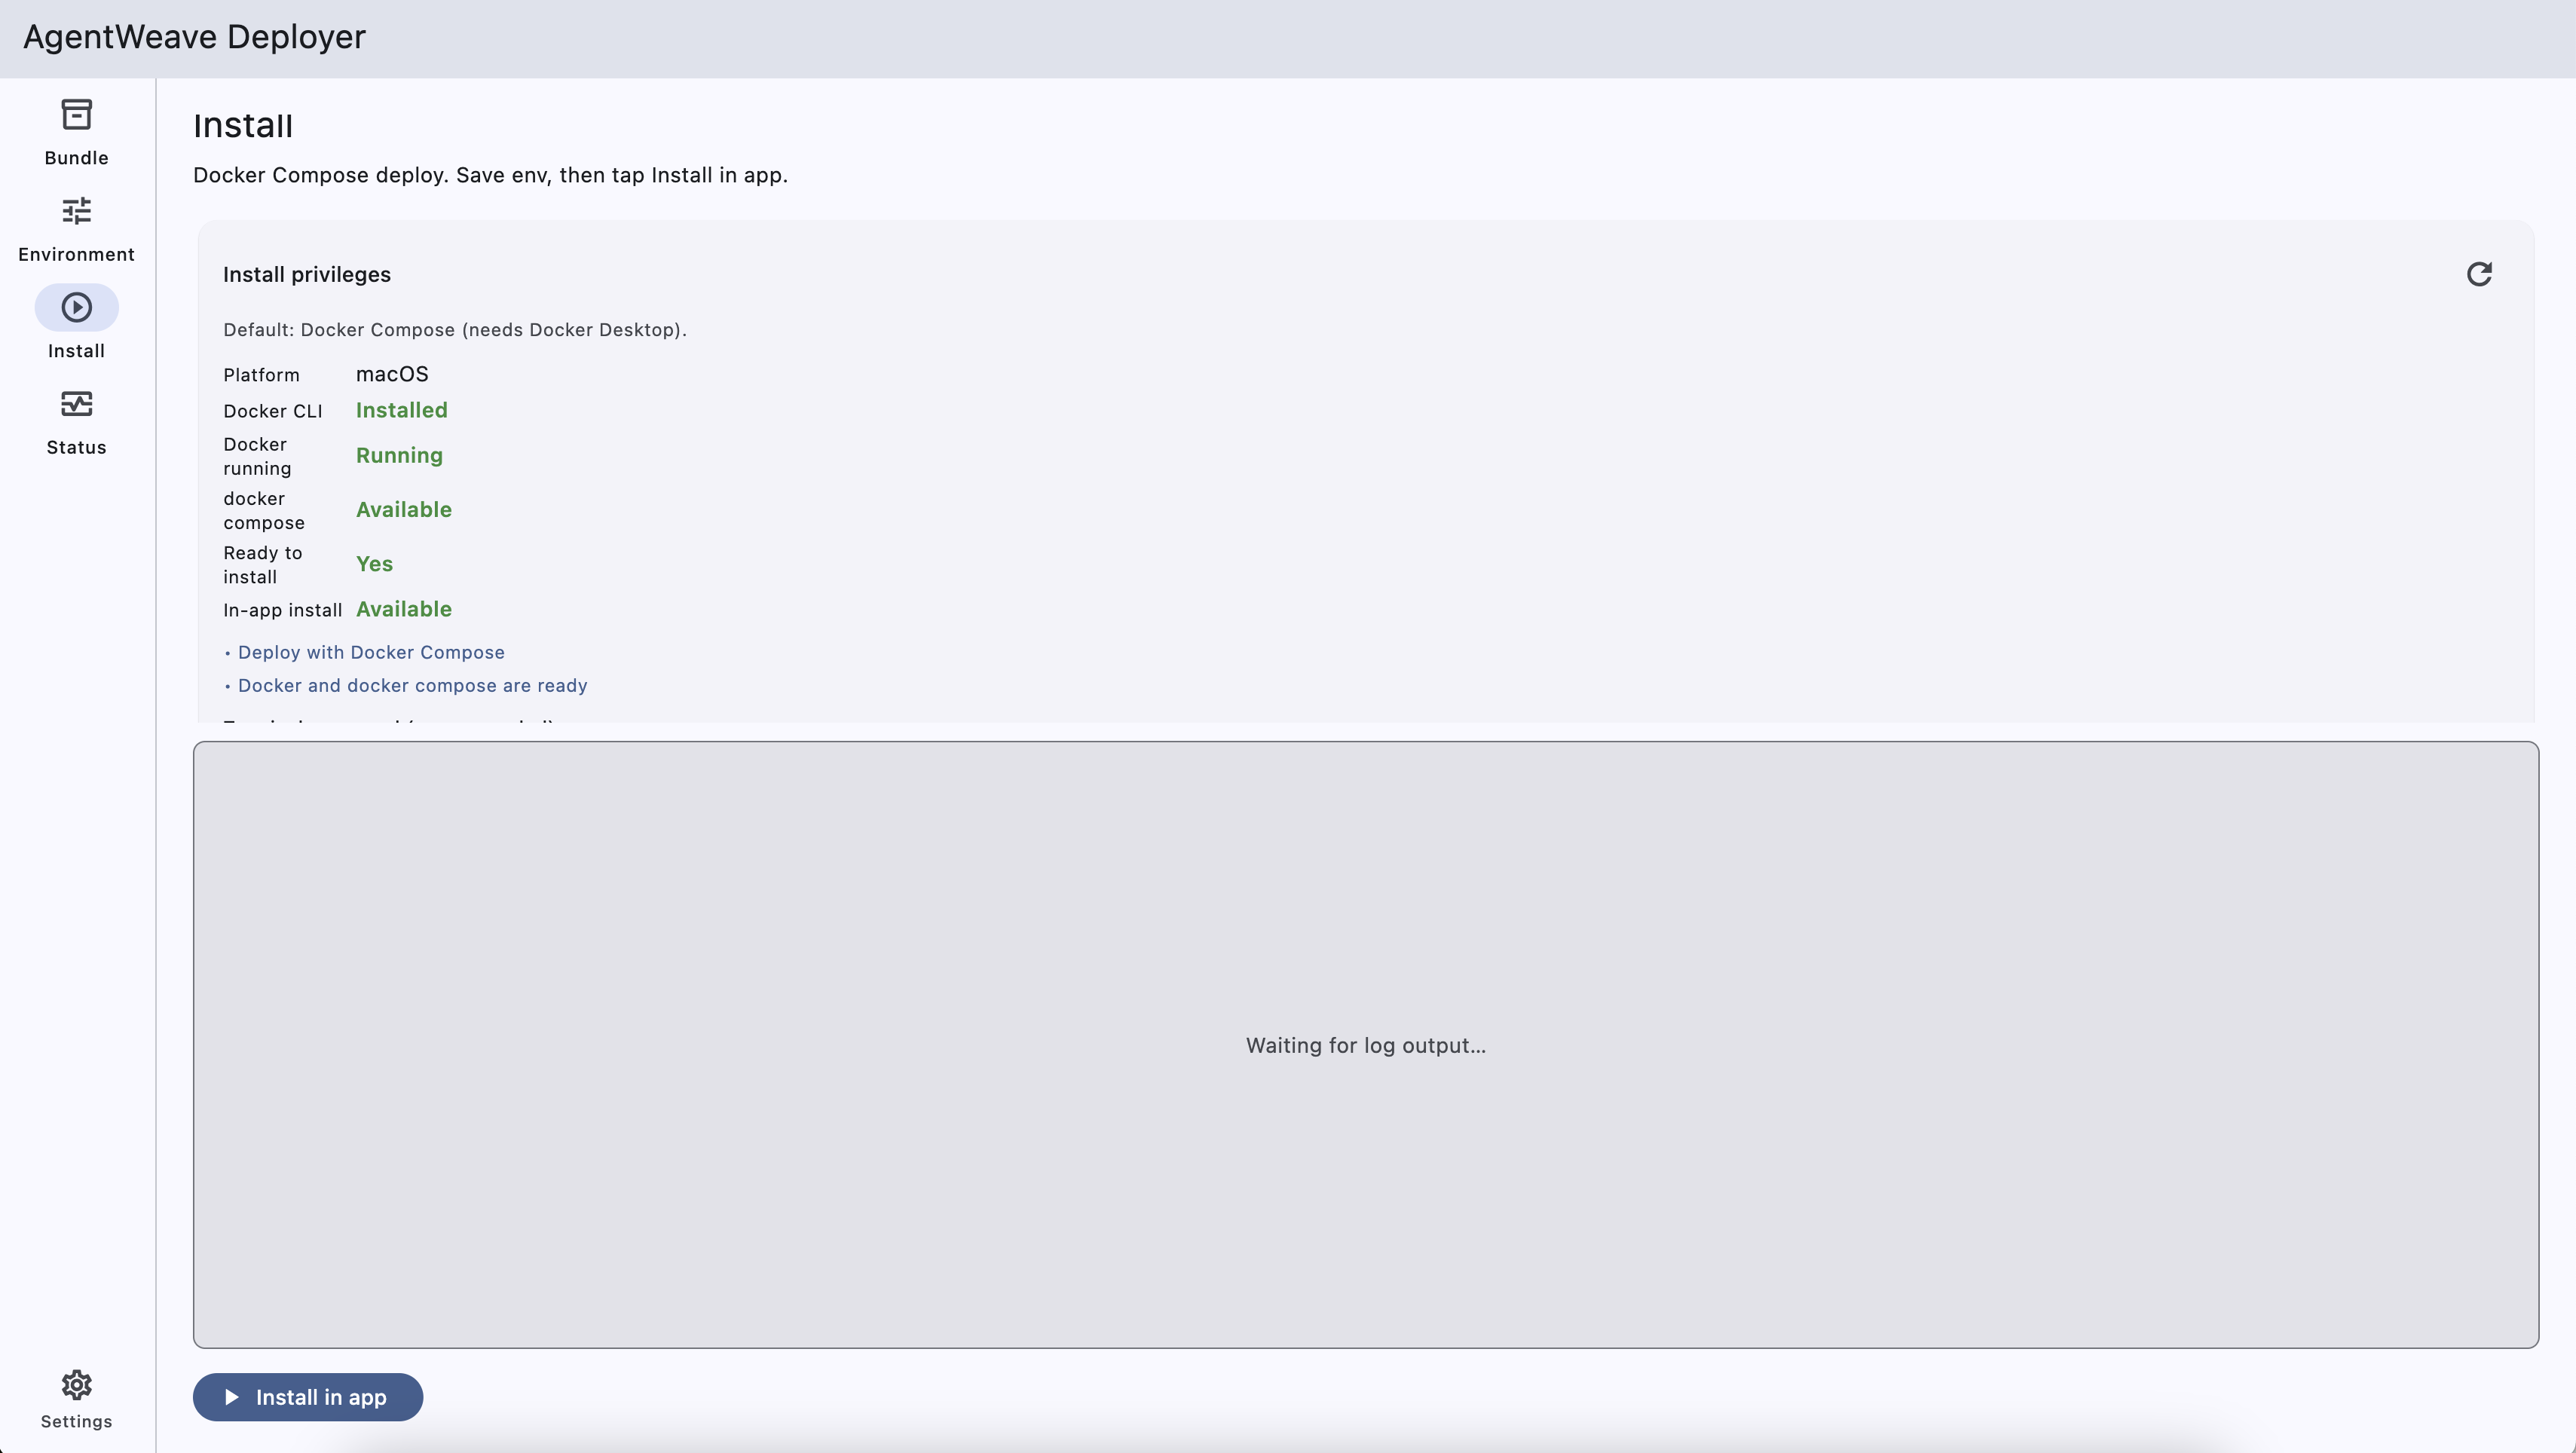
The Deployer deploys with Docker Compose, so it needs Docker Desktop. On the Install step it checks your environment; if Docker is not detected it shows Ready to install: No with an Install Docker button (and an install guide).
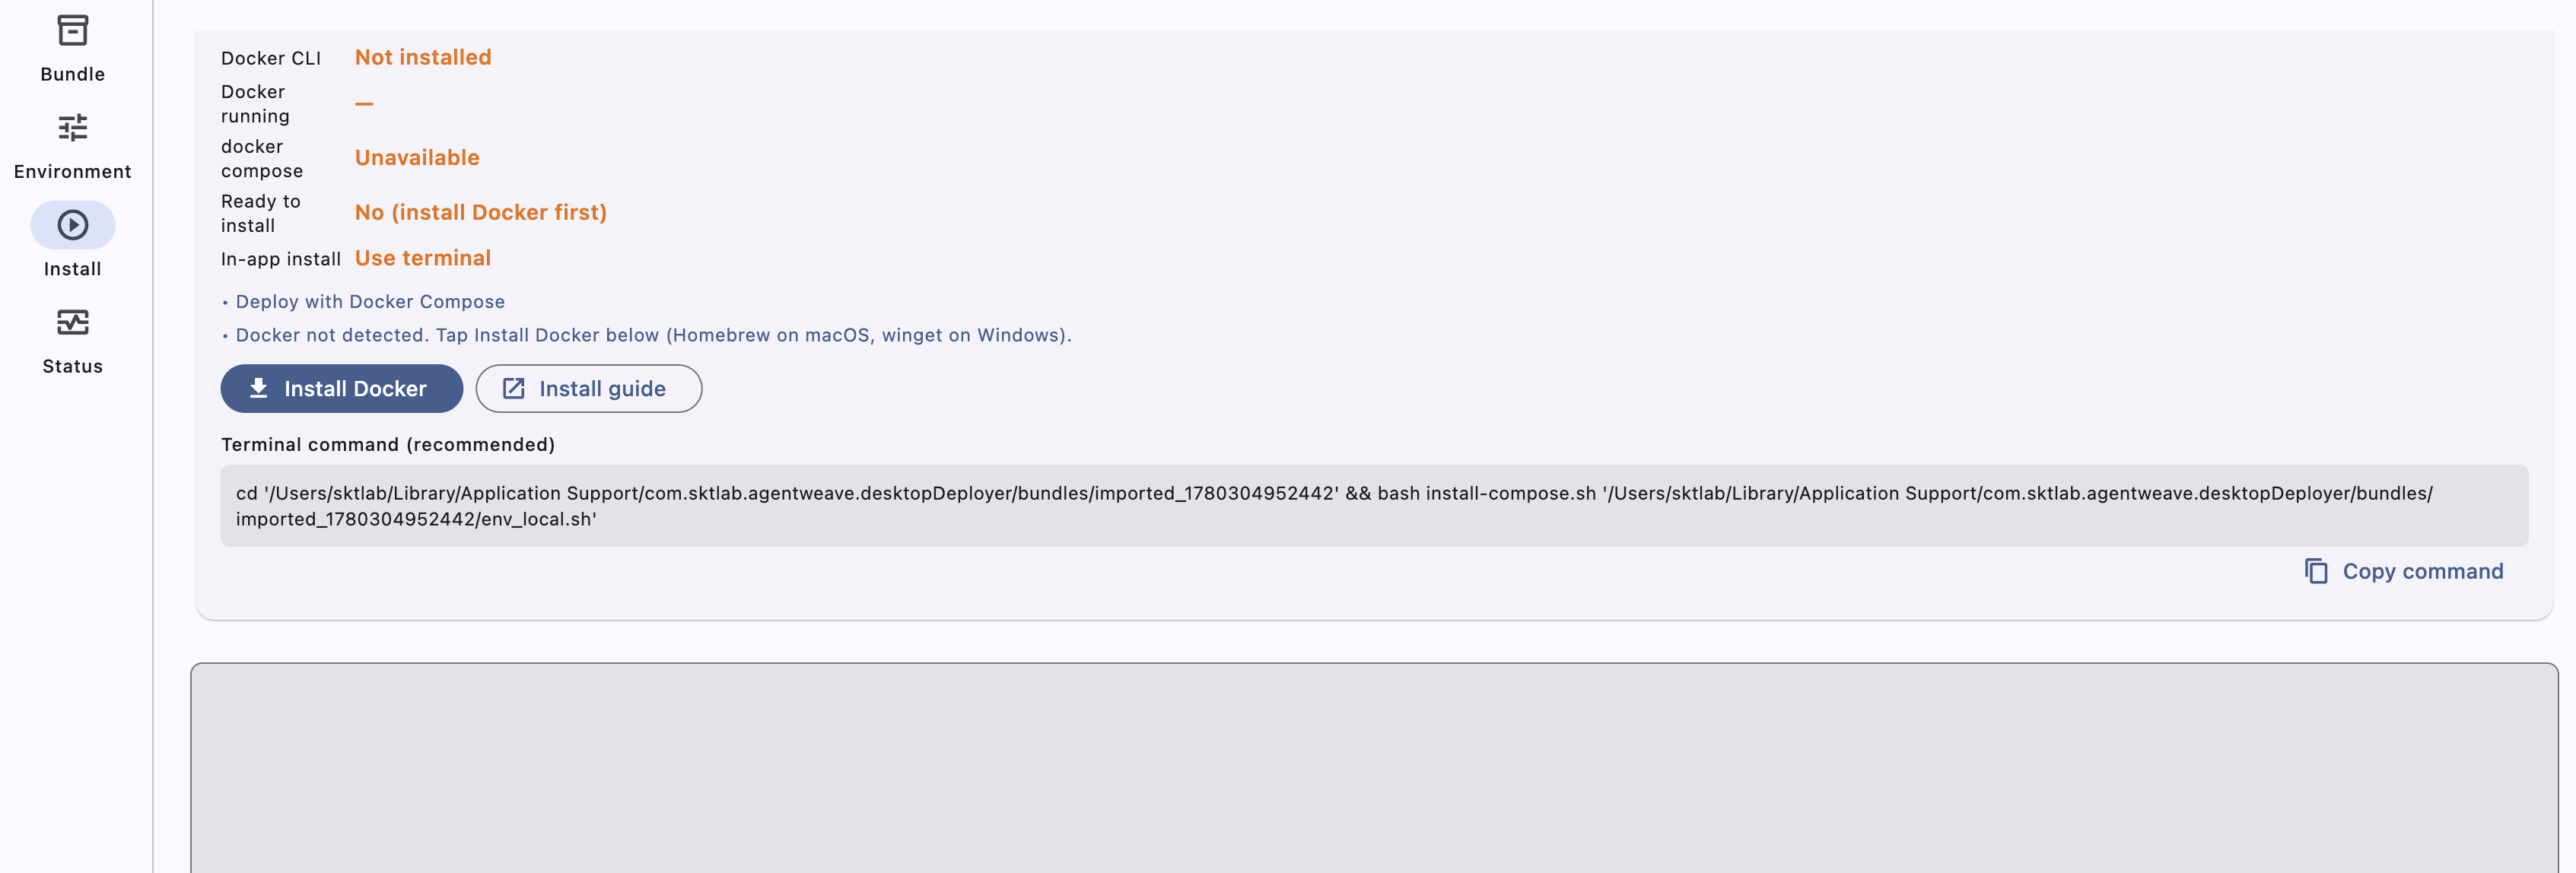
2.5 Deploy (Install)
Once Docker is running, the Install step shows Ready to install: Yes. Tap Install (or Redeploy) to bring the stack up with Docker Compose.
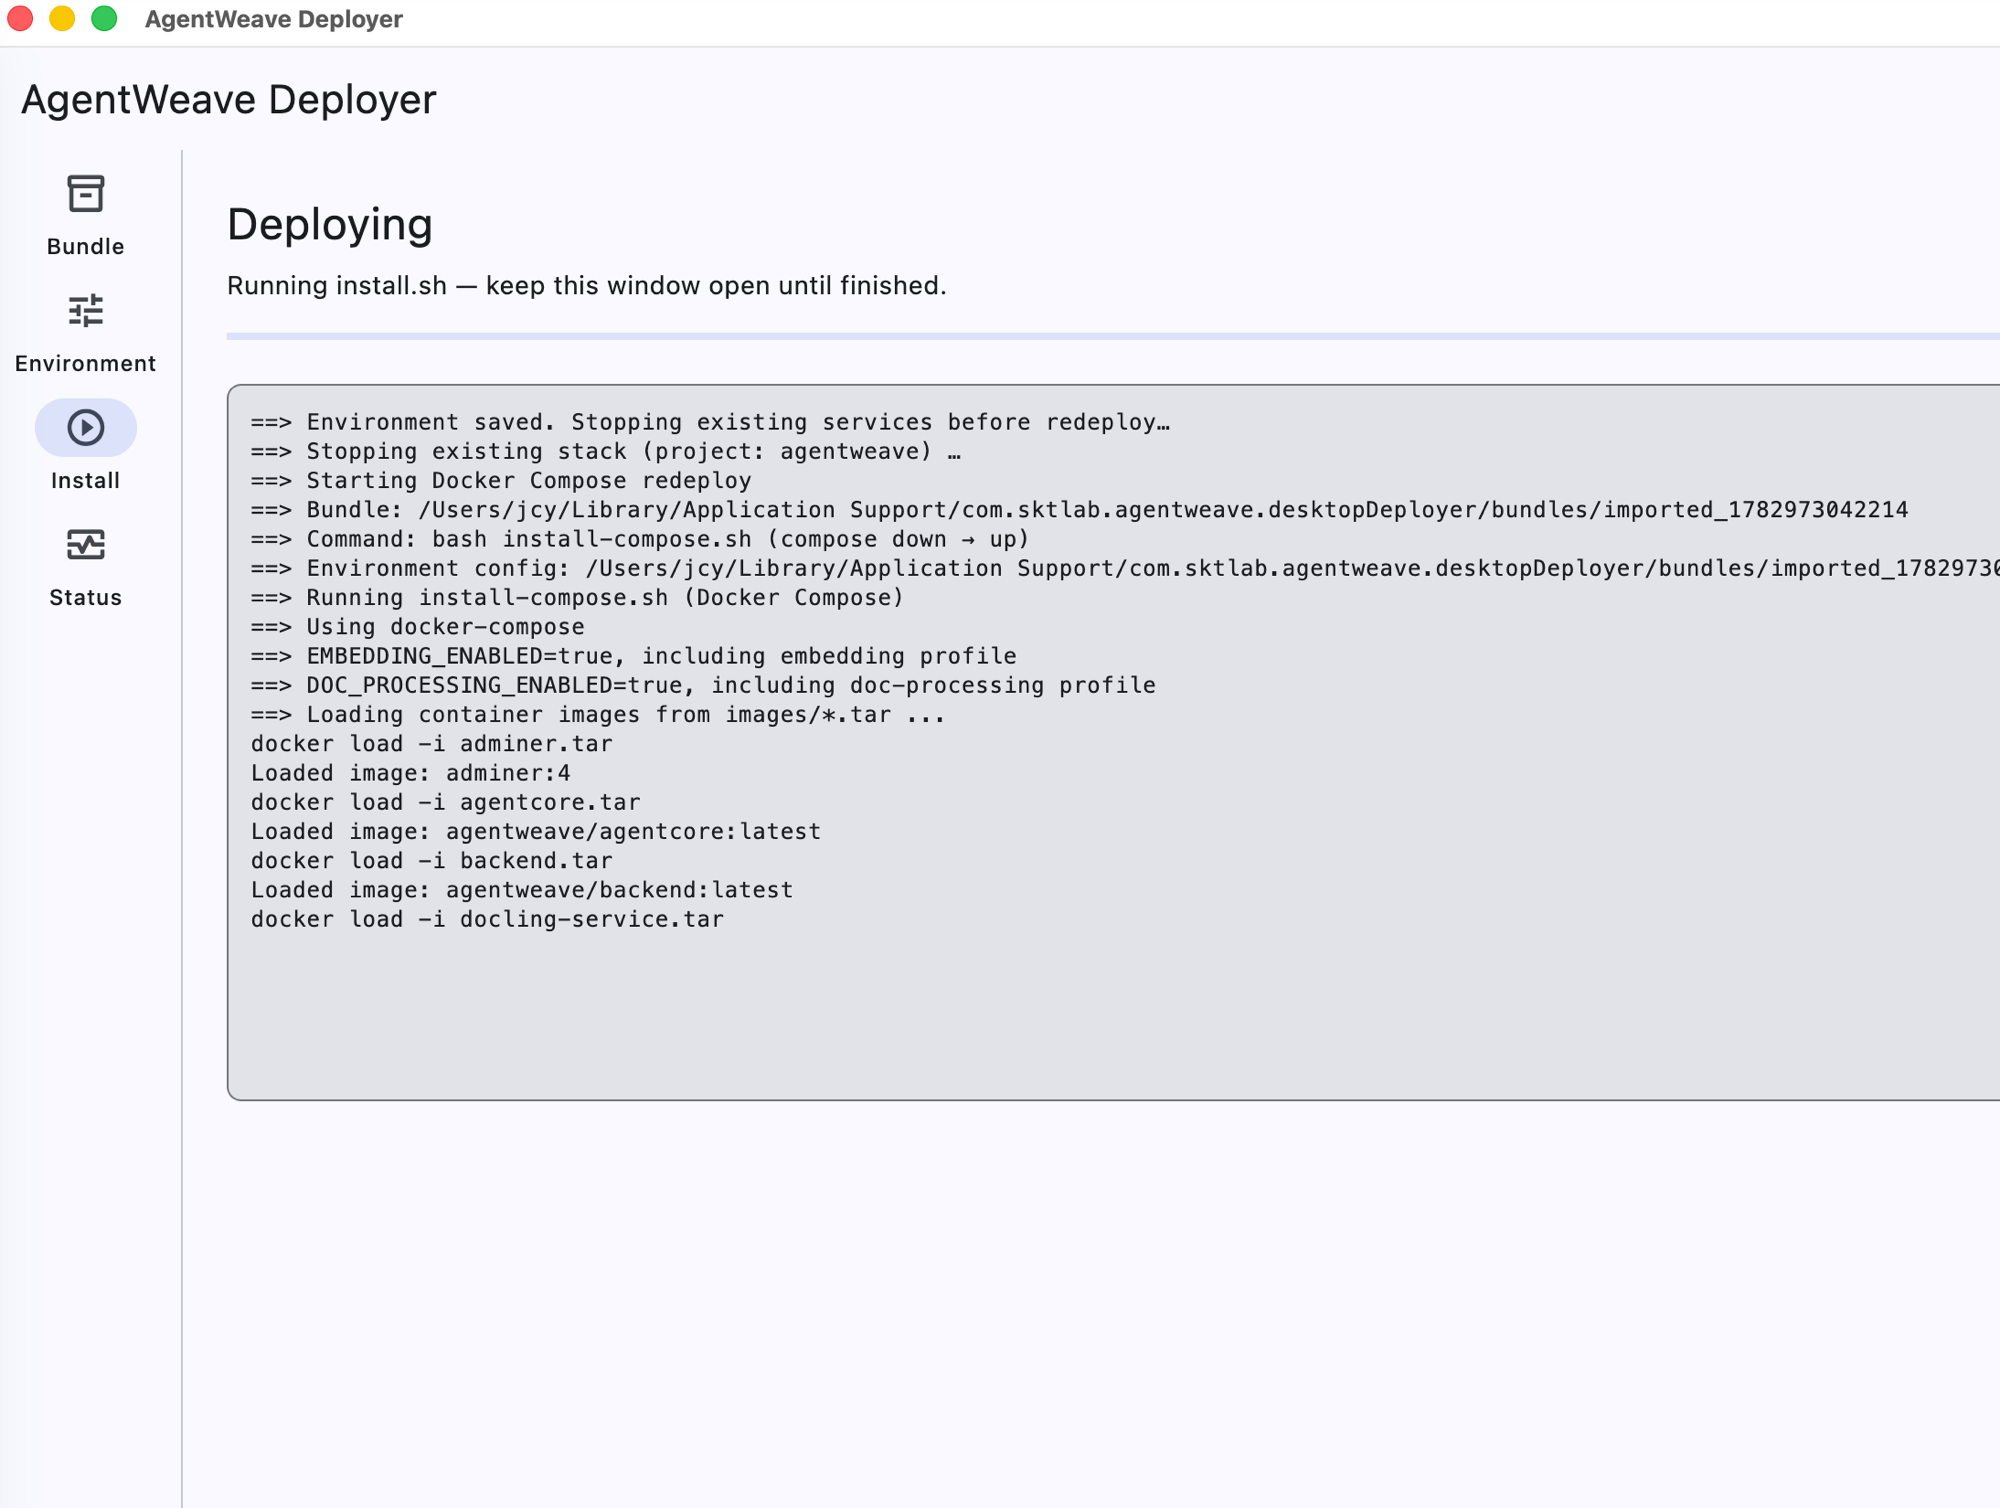
Keep the window open until it finishes; the live log streams progress — loading images and starting each service — and reports success or errors.
2.6 Check status (Status)
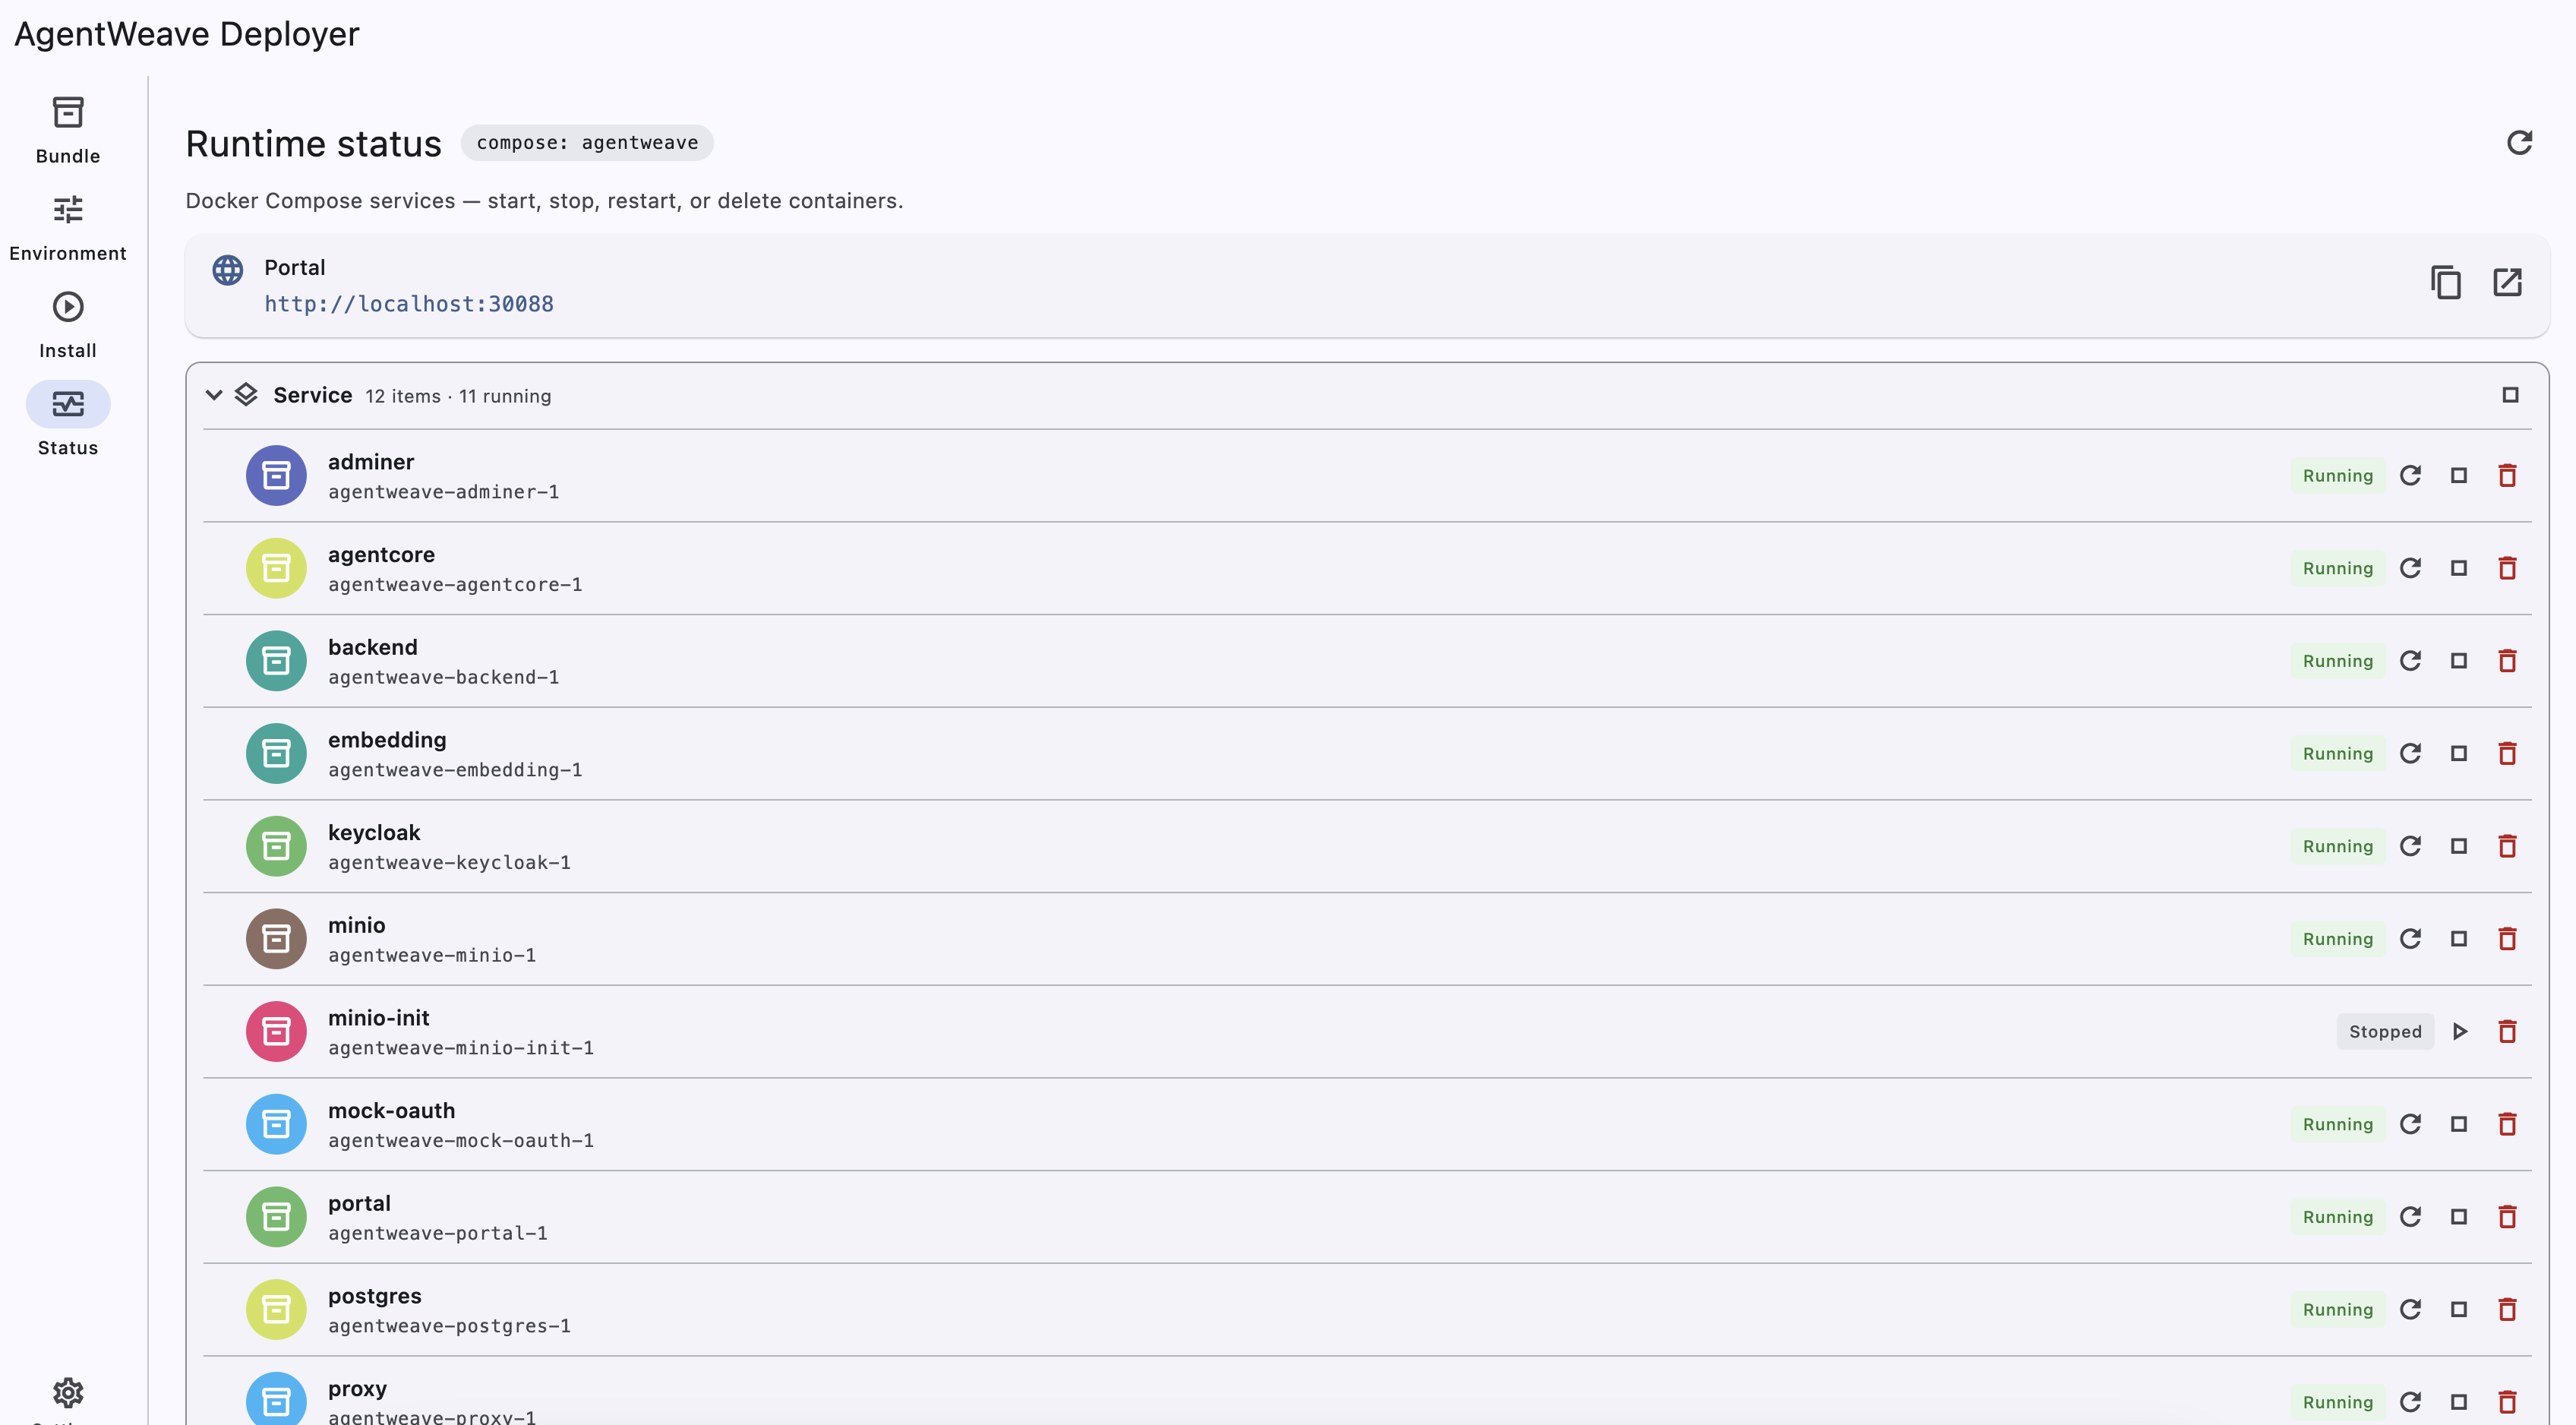
Open the Status step to see each service's runtime state — you can start, stop, restart, or view logs per container, and the banner shows the portal URL. A healthy install shows the services Running. Click the refresh icon any time to re-check.
2.7 Open the portal and sign in
Click the access icon on the far right of the Deployer, or open the portal URL (e.g. http://localhost:30088) in your browser to view the agent list.
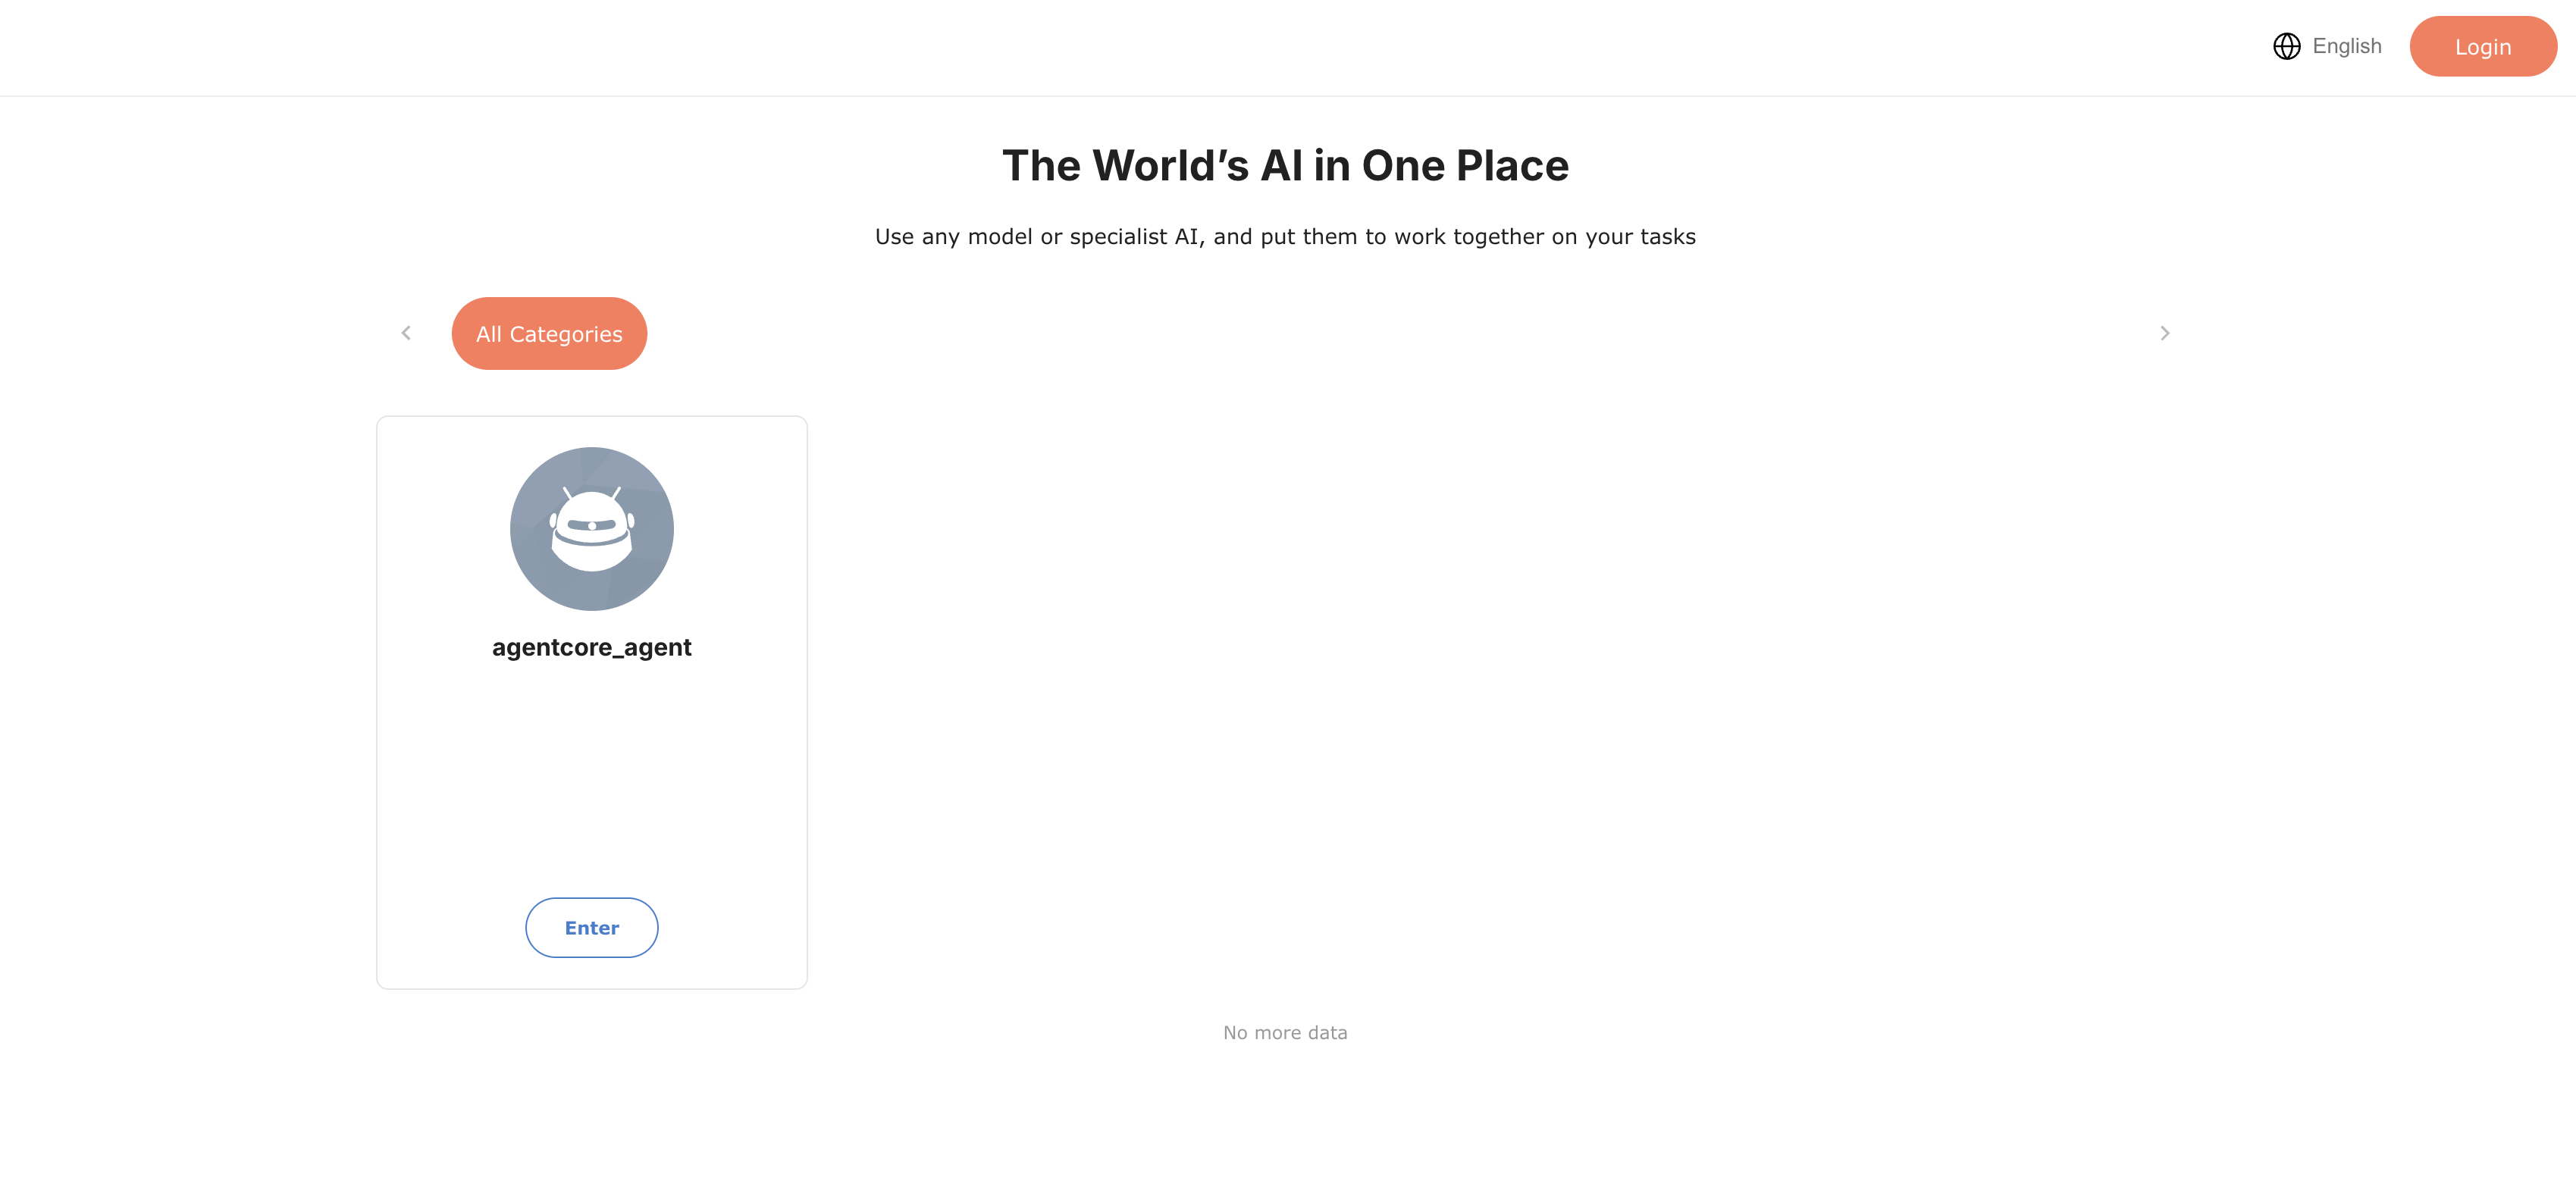
Click Login in the upper-right corner and sign in:
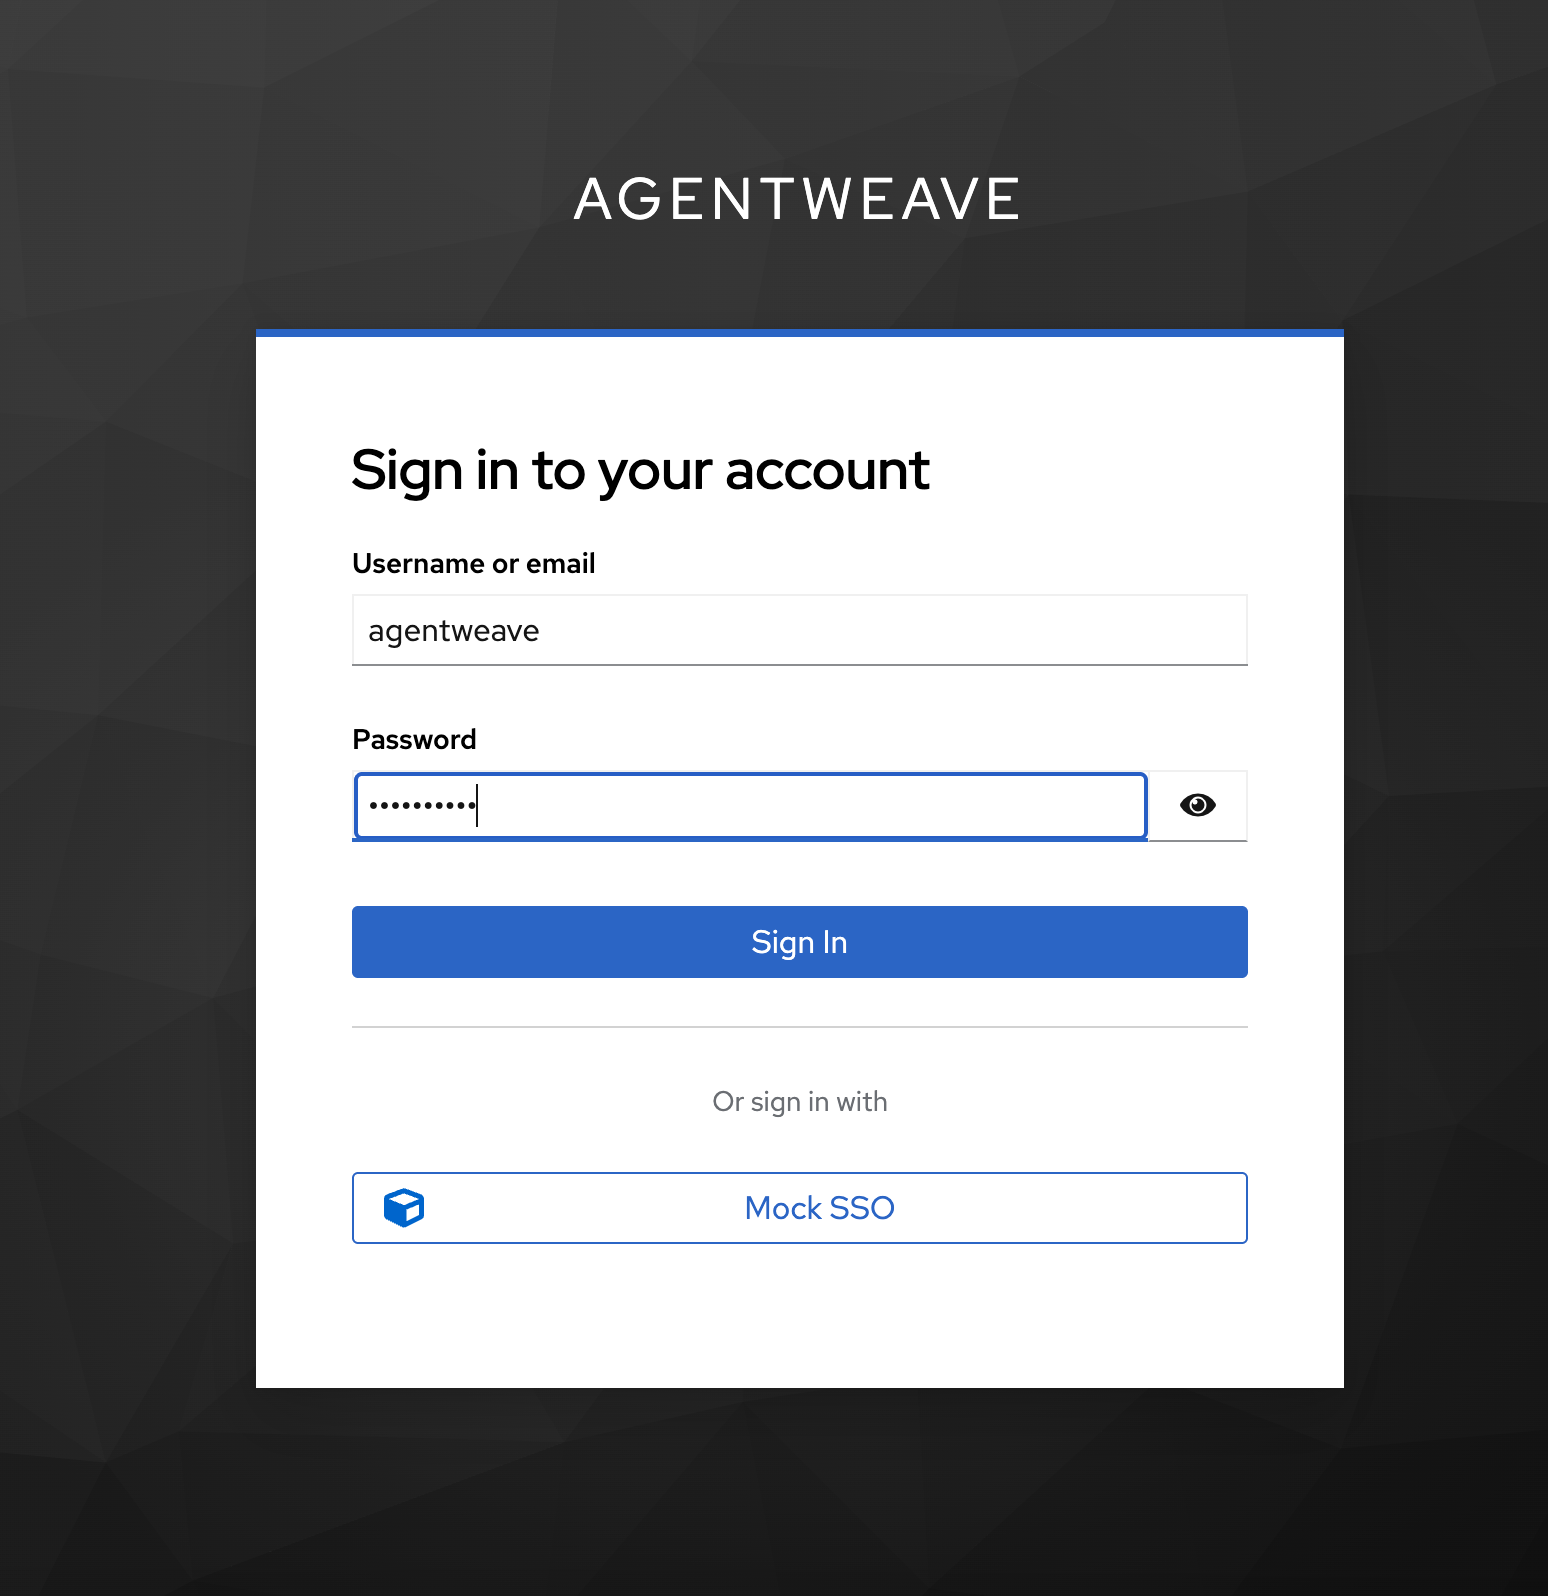
- Username:
agentweave - Password:
agentweave
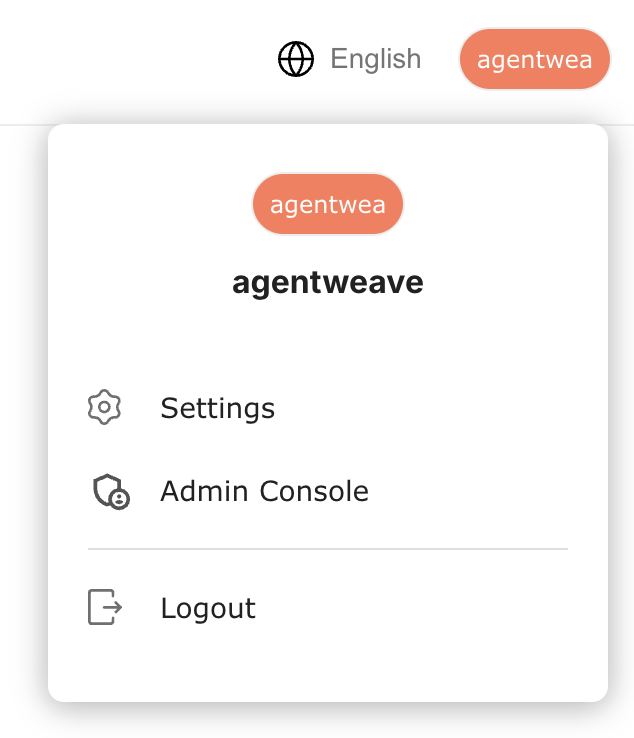
To manage agents, click the agentweave menu in the upper-right corner and choose Admin Console.
3. Use case 1 — Run your own agents locally
With the model you configured in Section 2.3, agents run entirely inside your local deployment: chat requests are handled by your local runtime and forwarded to your own model provider.
3.1 Import an agent
In the Admin Console, open the Agents section.
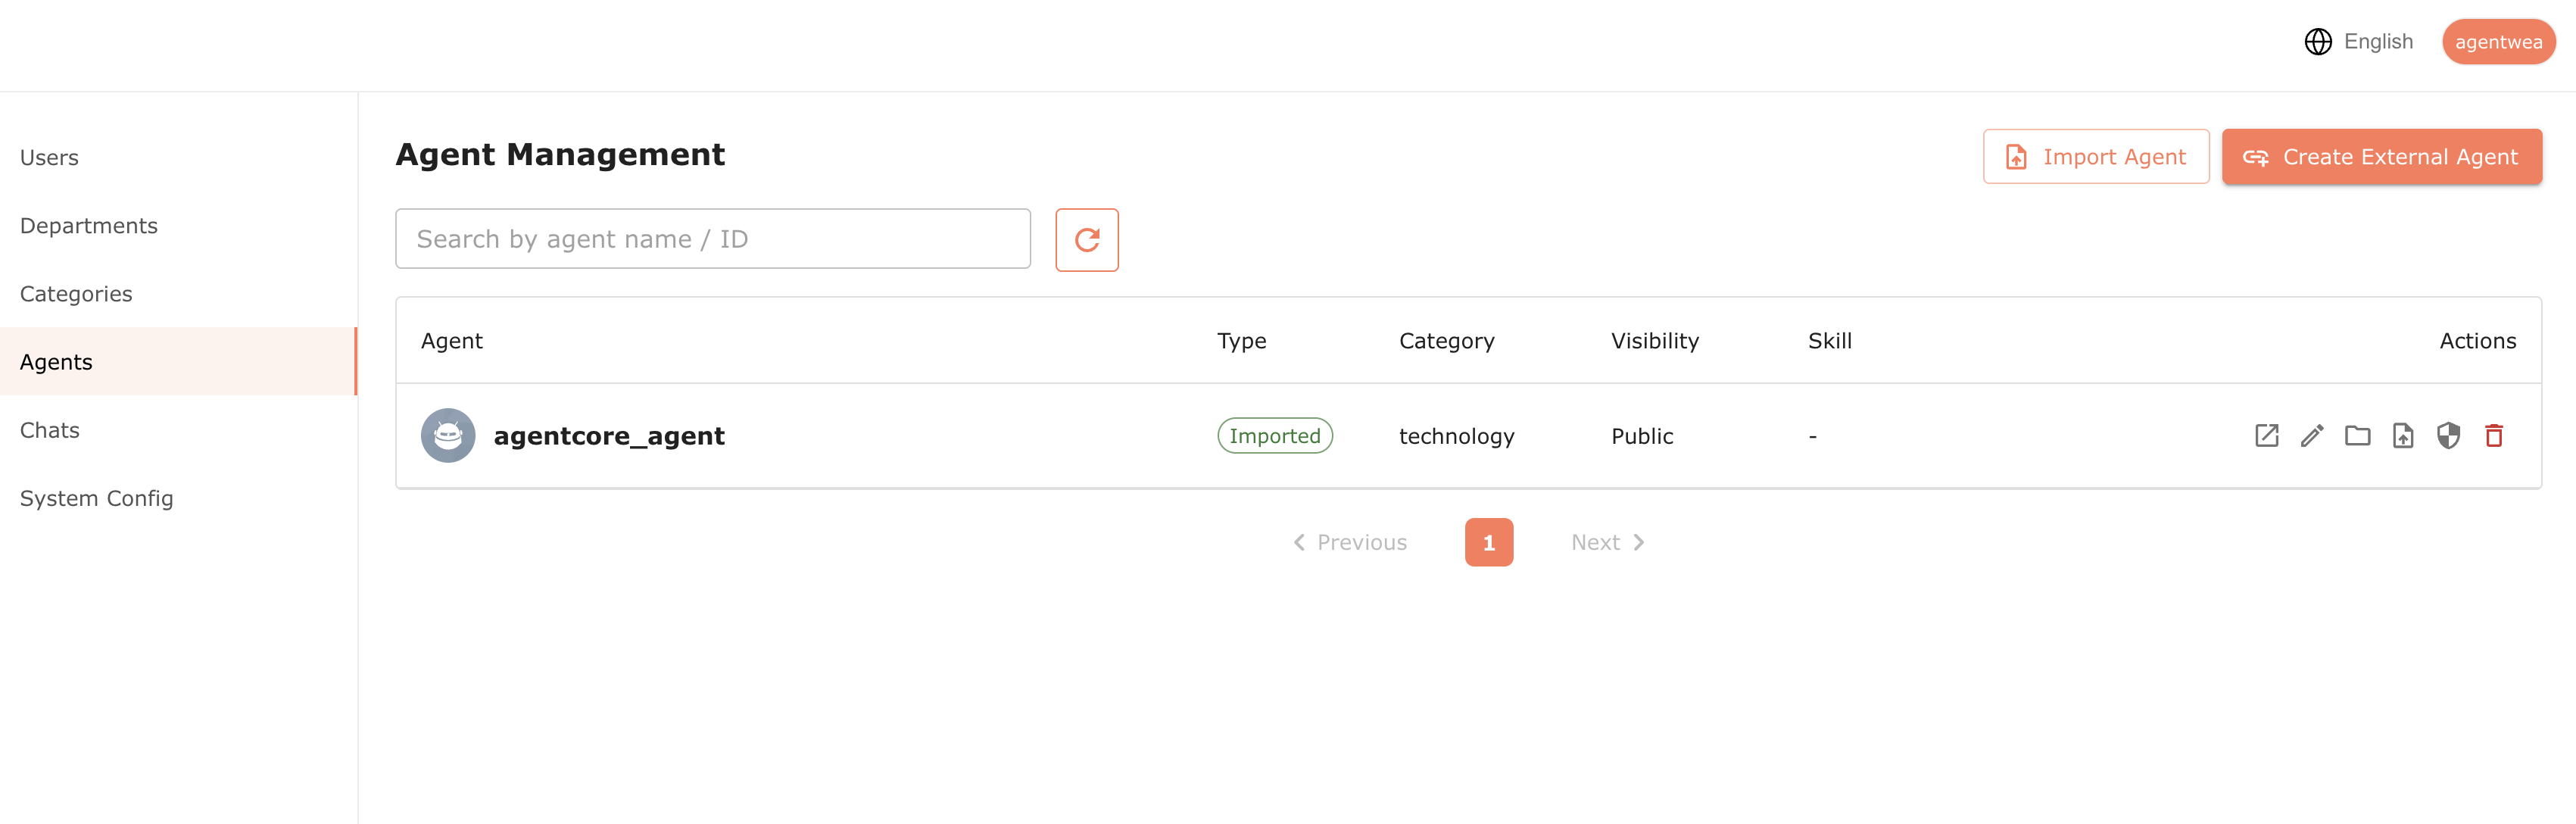
The local agent file is a deployment package exported from the cloud AgentWeave platform: on the cloud, open the agent's Manage → Local Deployment tab and click Export Local Deployment Package to download a .zip that bundles the agent's configuration (this is the same export used in Use case 3; a colleague may also share such a file with you).
Then click Import Agent, choose that file, and import it. After a successful import a new record appears in the list.
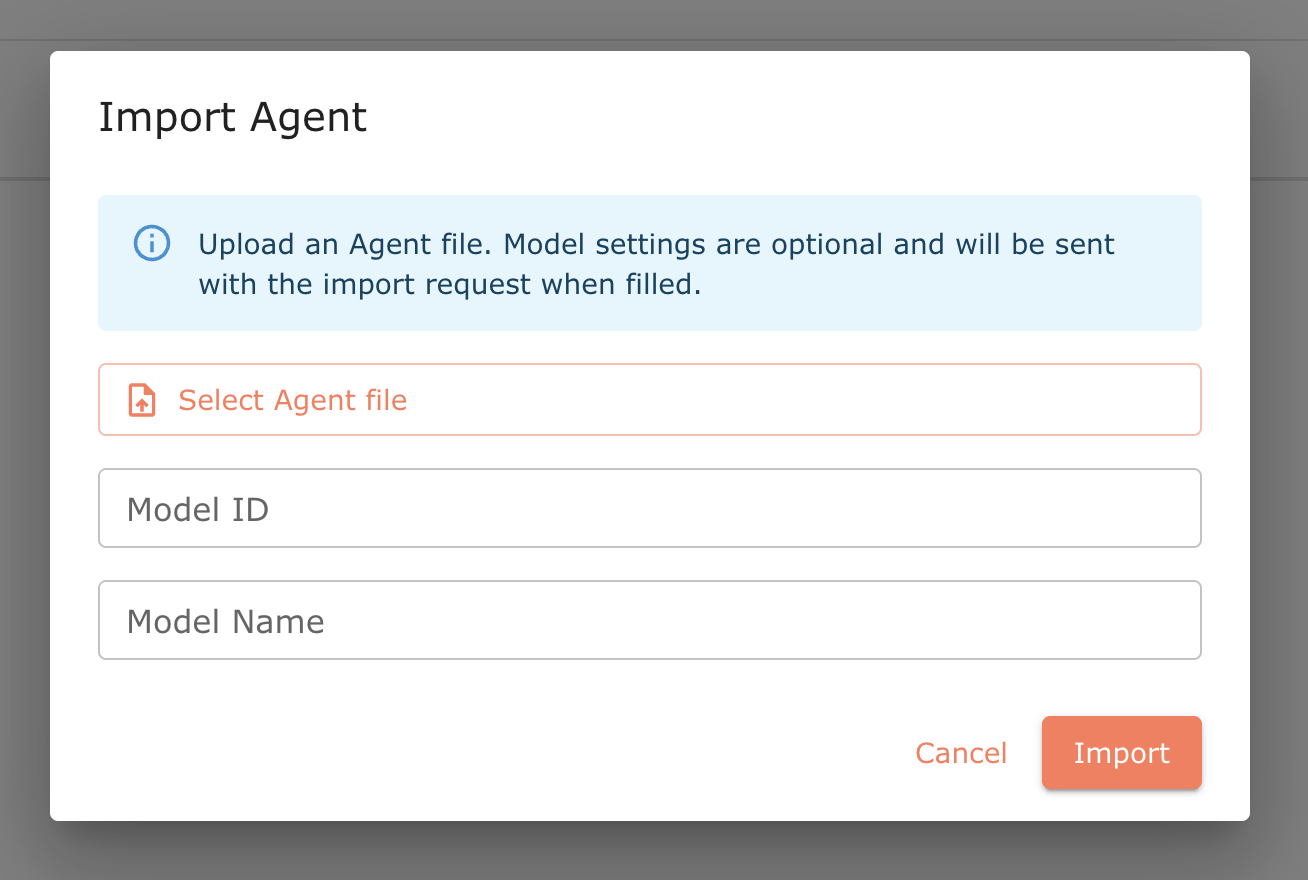
The dialog also has two optional model settings. Leave them empty and the agent uses your deployment's default model (AGENTCORE_DEFAULT_MODEL, set during install in Section 2.3). Fill them only to make this agent use a different model your provider supports — for example, if you set deepseek-chat as the default but want this agent to run on deepseek-reasoner:
- Model ID — the model identifier sent to the provider (e.g.
deepseek-reasoner); overrides the default for this agent only. - Model Name — a display label for that model.
You can also change these later by editing the agent.
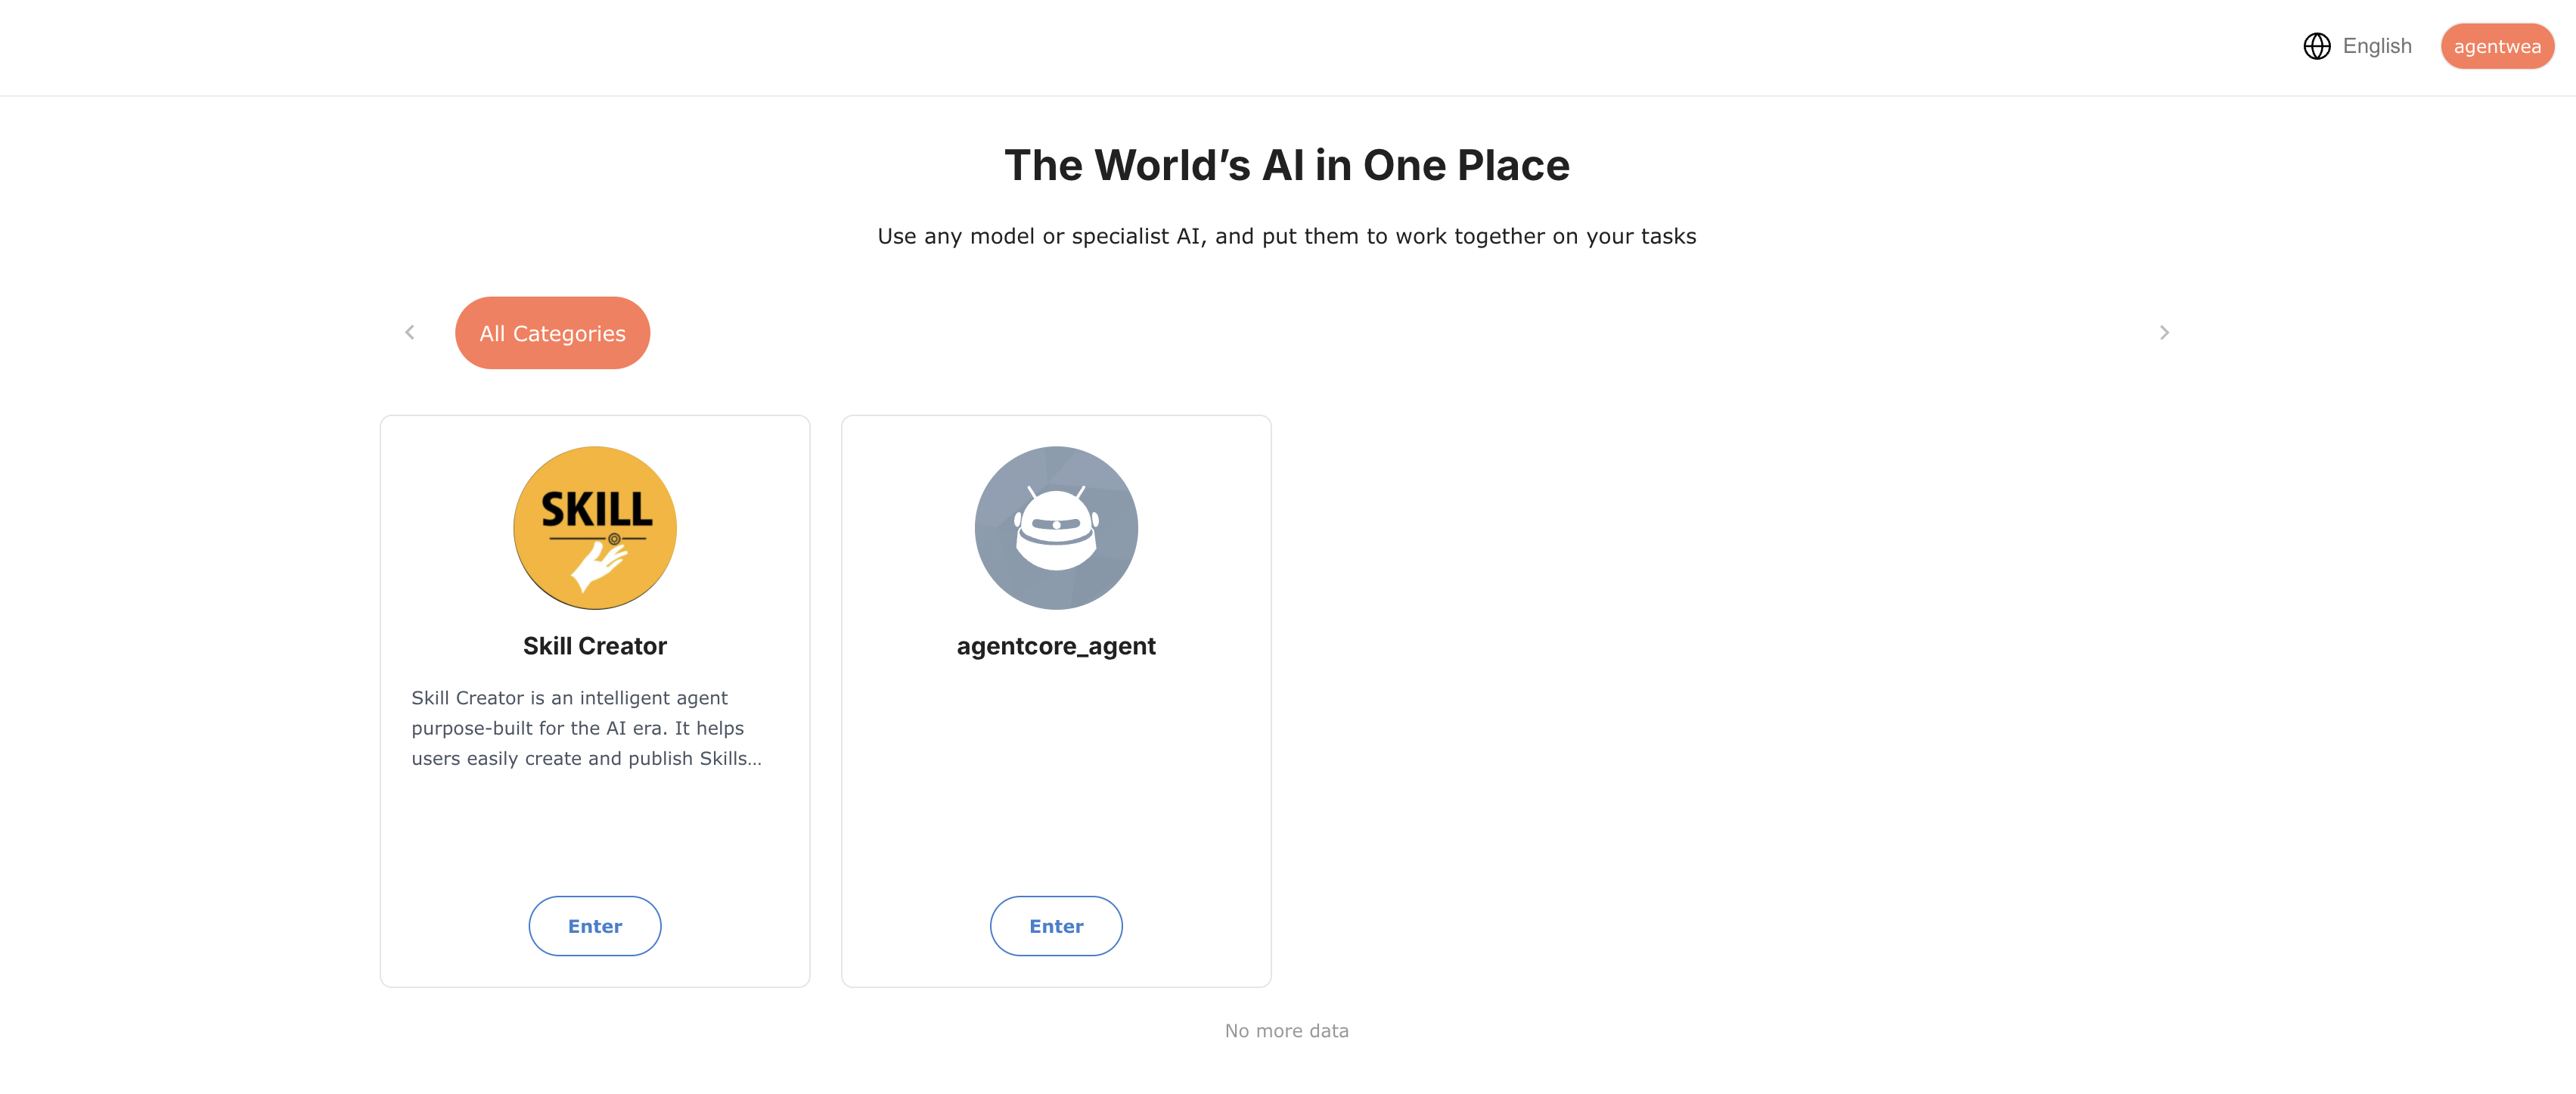
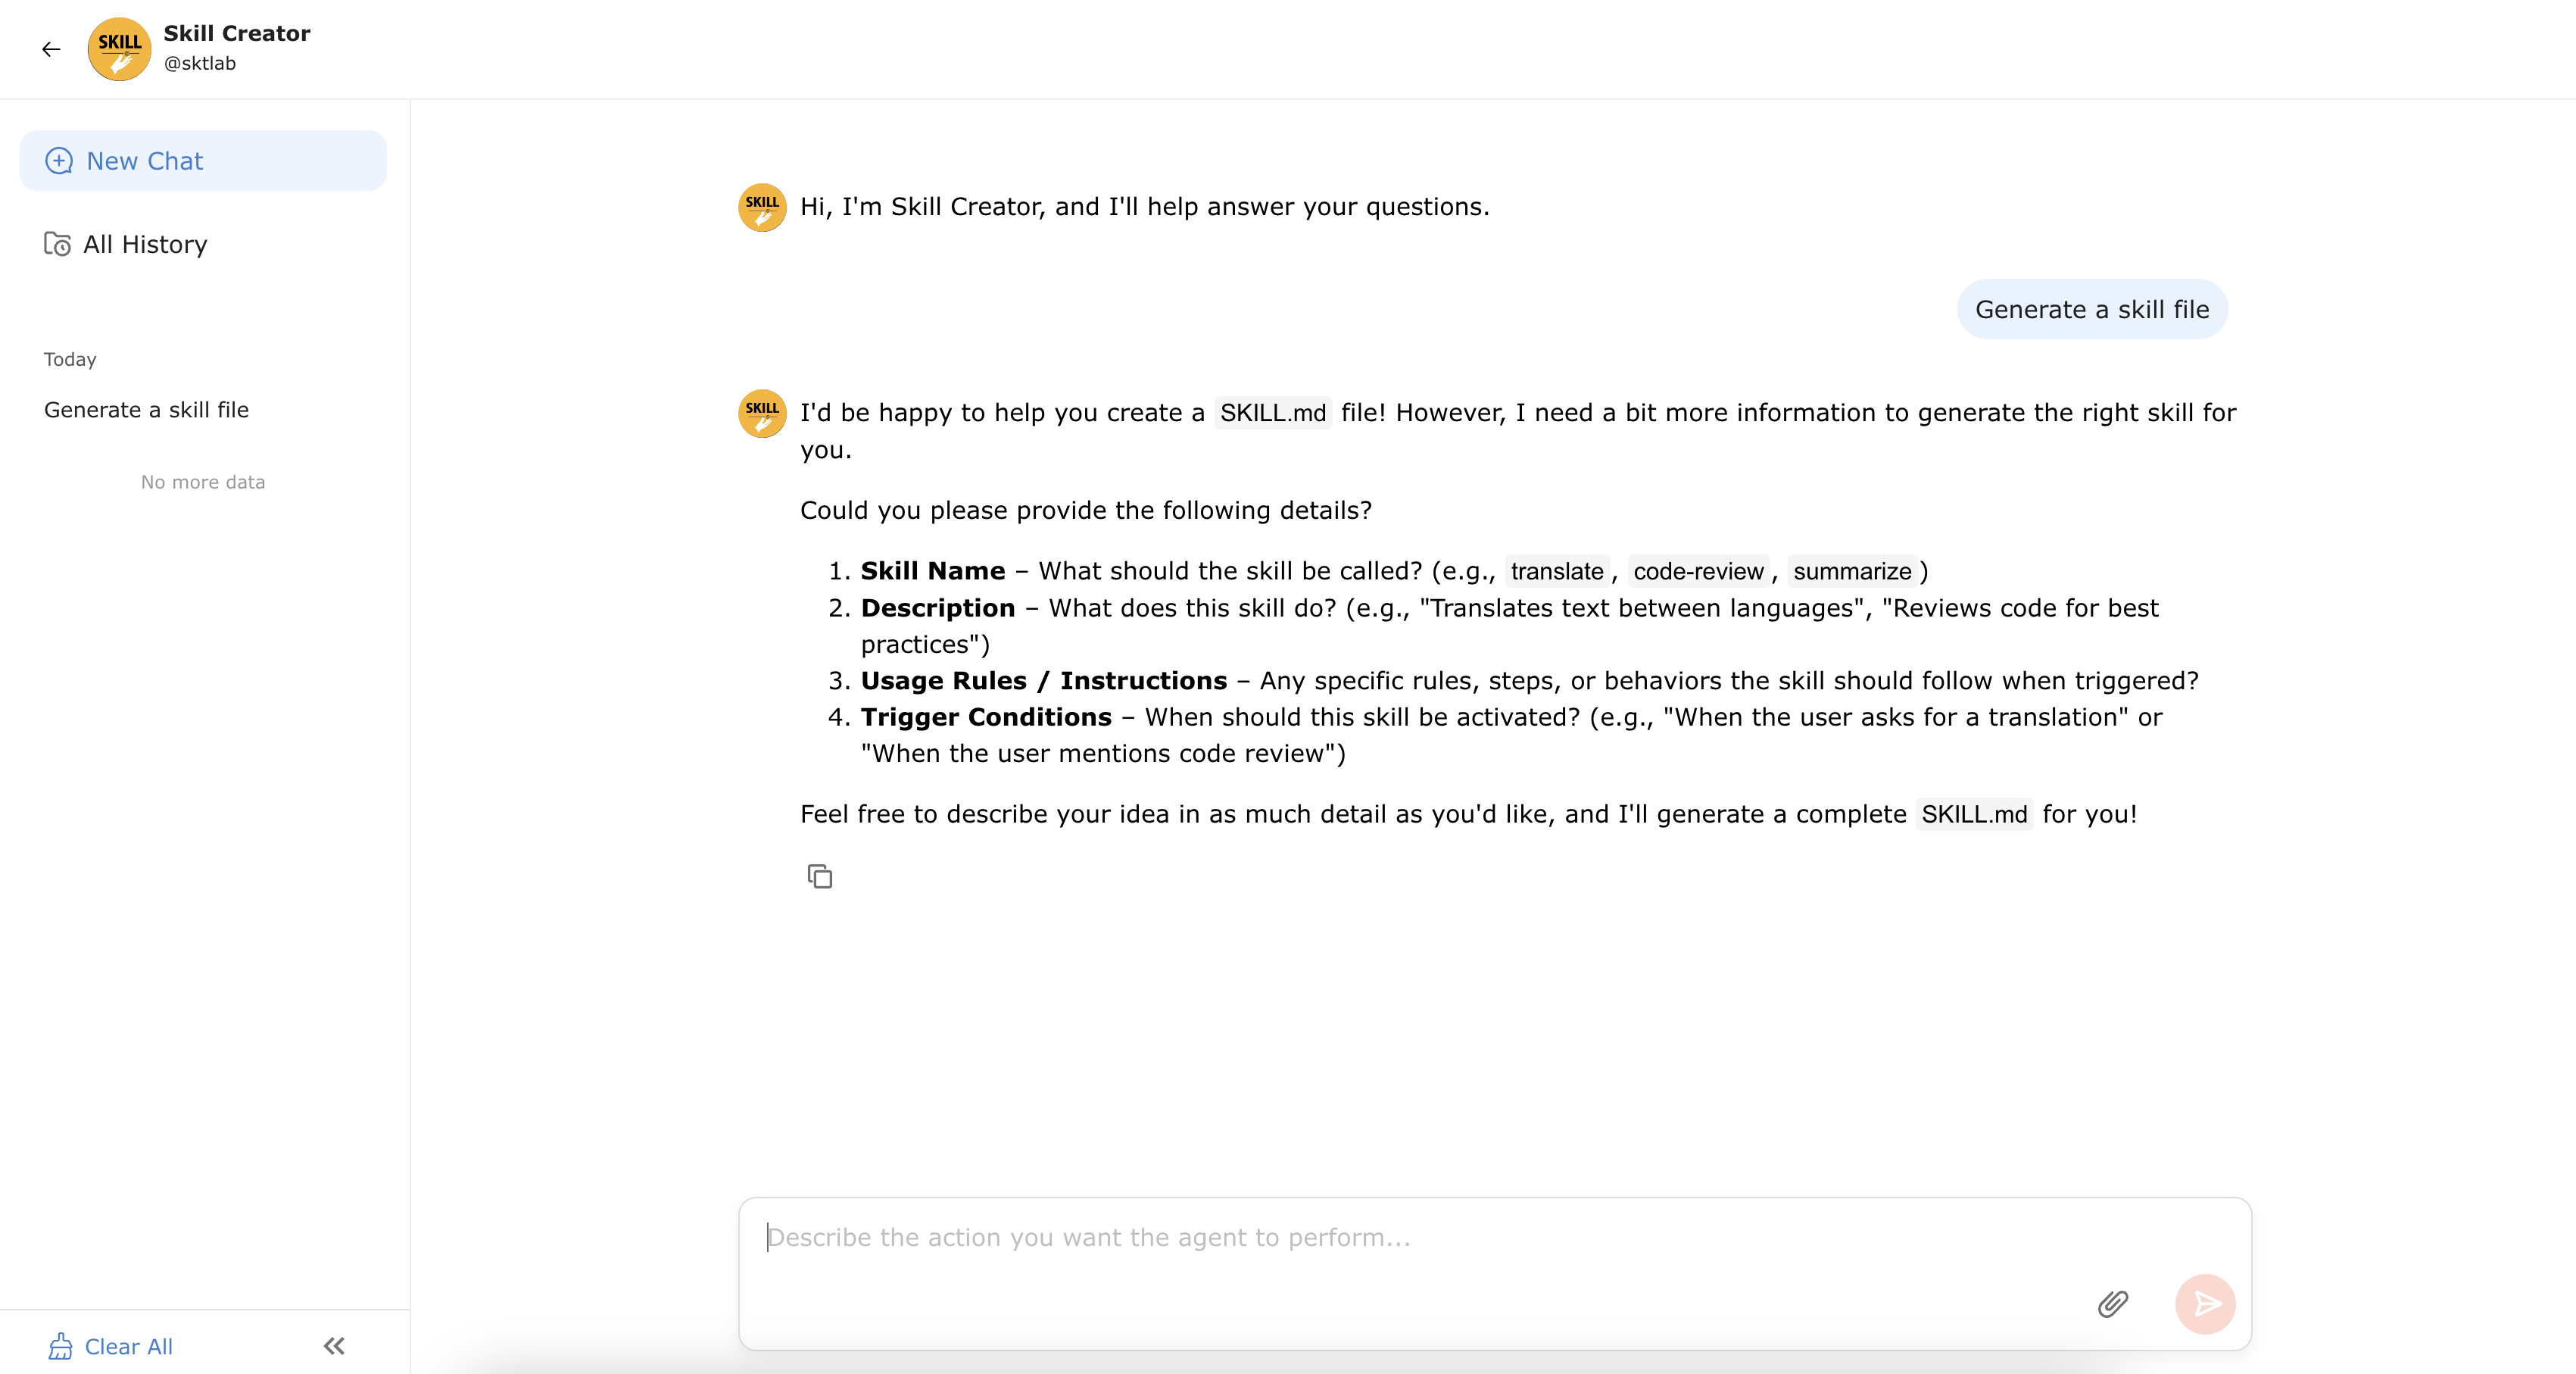
3.2 Chat with an agent
Return to the AgentWeave portal home, pick an agent to open its chat page, and send a message — it replies with generated content, produced by your local deployment.
3.3 (Advanced) Register an external chat service or agent as a Self-hosted Agent
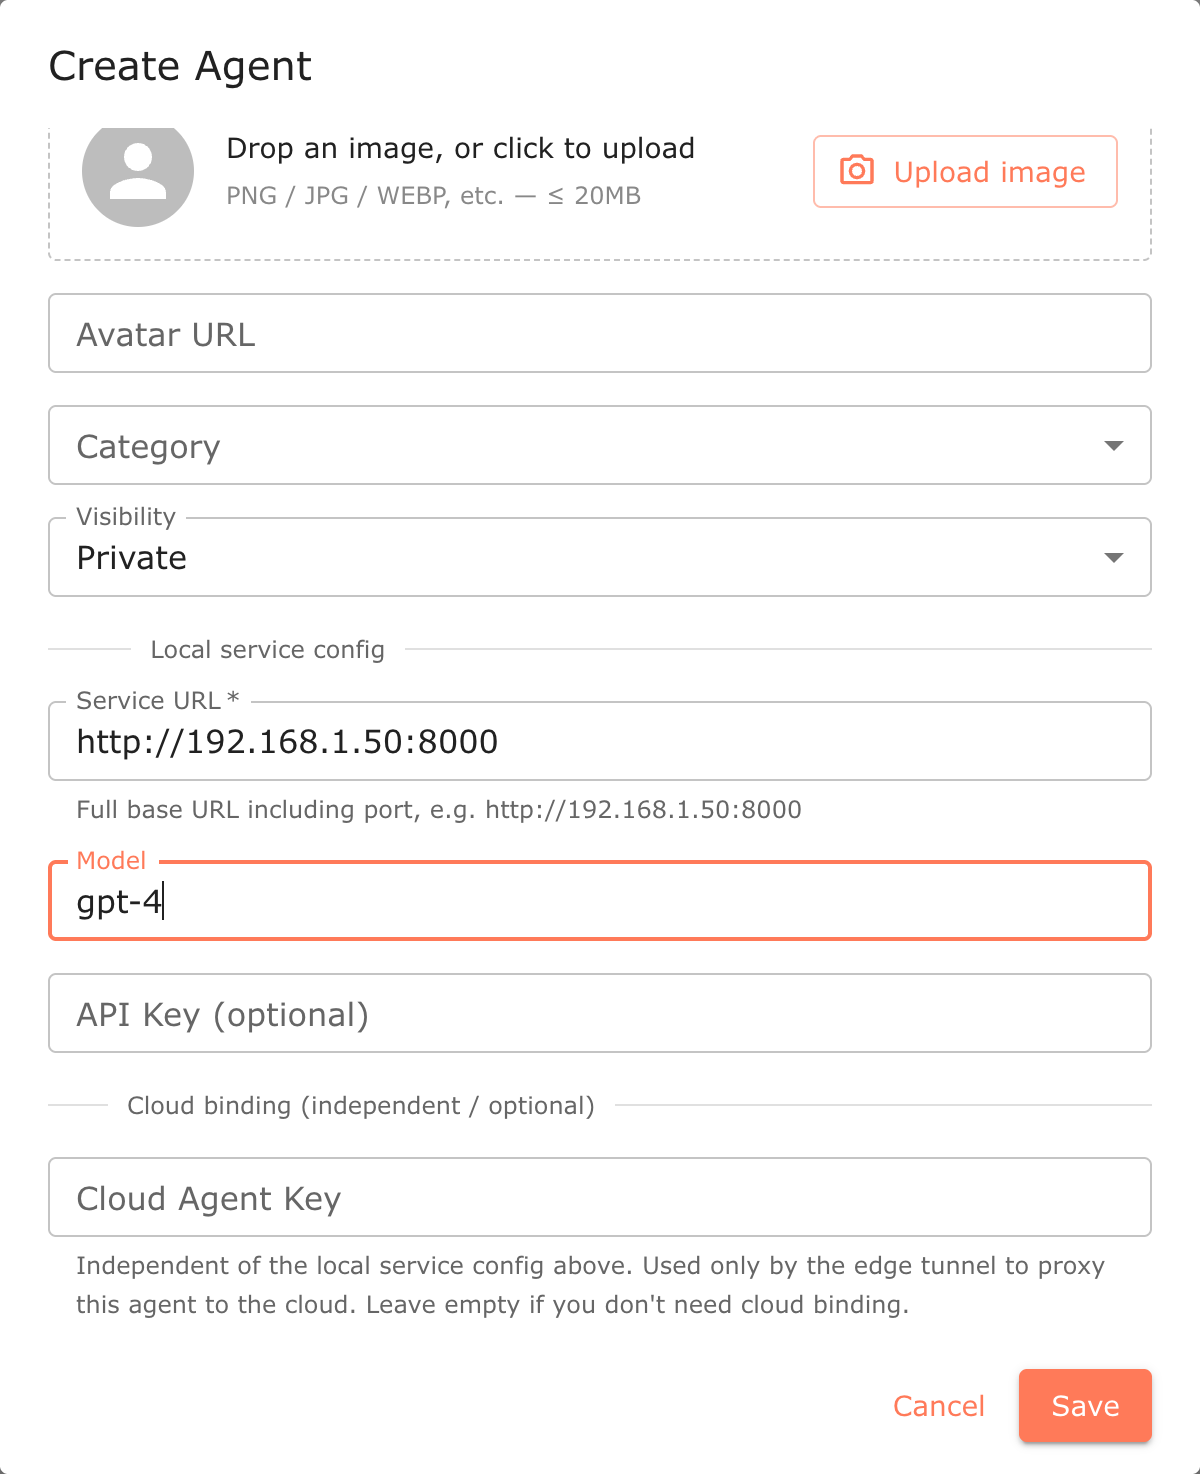
If you already run your own OpenAI-compatible chat service or agent, you can register it as a Self-hosted Agent: AgentWeave only forwards and stores the conversations, while the actual execution logic is handled entirely by your own agent. In Admin Console → Agents, click Create Agent and keep the default Self-hosted Agent type (the shared fields are described in Section 6.1). Then fill the Local service config:
| Field | Required | What it does |
|---|---|---|
| Service URL | Yes | Full base URL of your OpenAI-compatible chat service, including the port, e.g. http://192.168.1.50:8000. AgentWeave sends chat requests here in OpenAI format. |
| Model | No | The model id your service expects (sent as the model field). |
| API Key (optional) | No | The API key your service requires, if any. Stored encrypted. |
Leave Cloud Agent Key empty unless you also want cloud binding (that is Use case 3). Click Save — the agent appears in the list with an External Agent type badge and can be used from the portal like any other agent.
4. Use case 2 — Link to an external agent (Web-redirect)
A Web-redirect Agent is a shortcut: it shows up in your portal but, when clicked, opens an external website and leaves the platform. There is no chat integration — use it to surface an agent you already use elsewhere.
4.1 Create a Web-redirect Agent
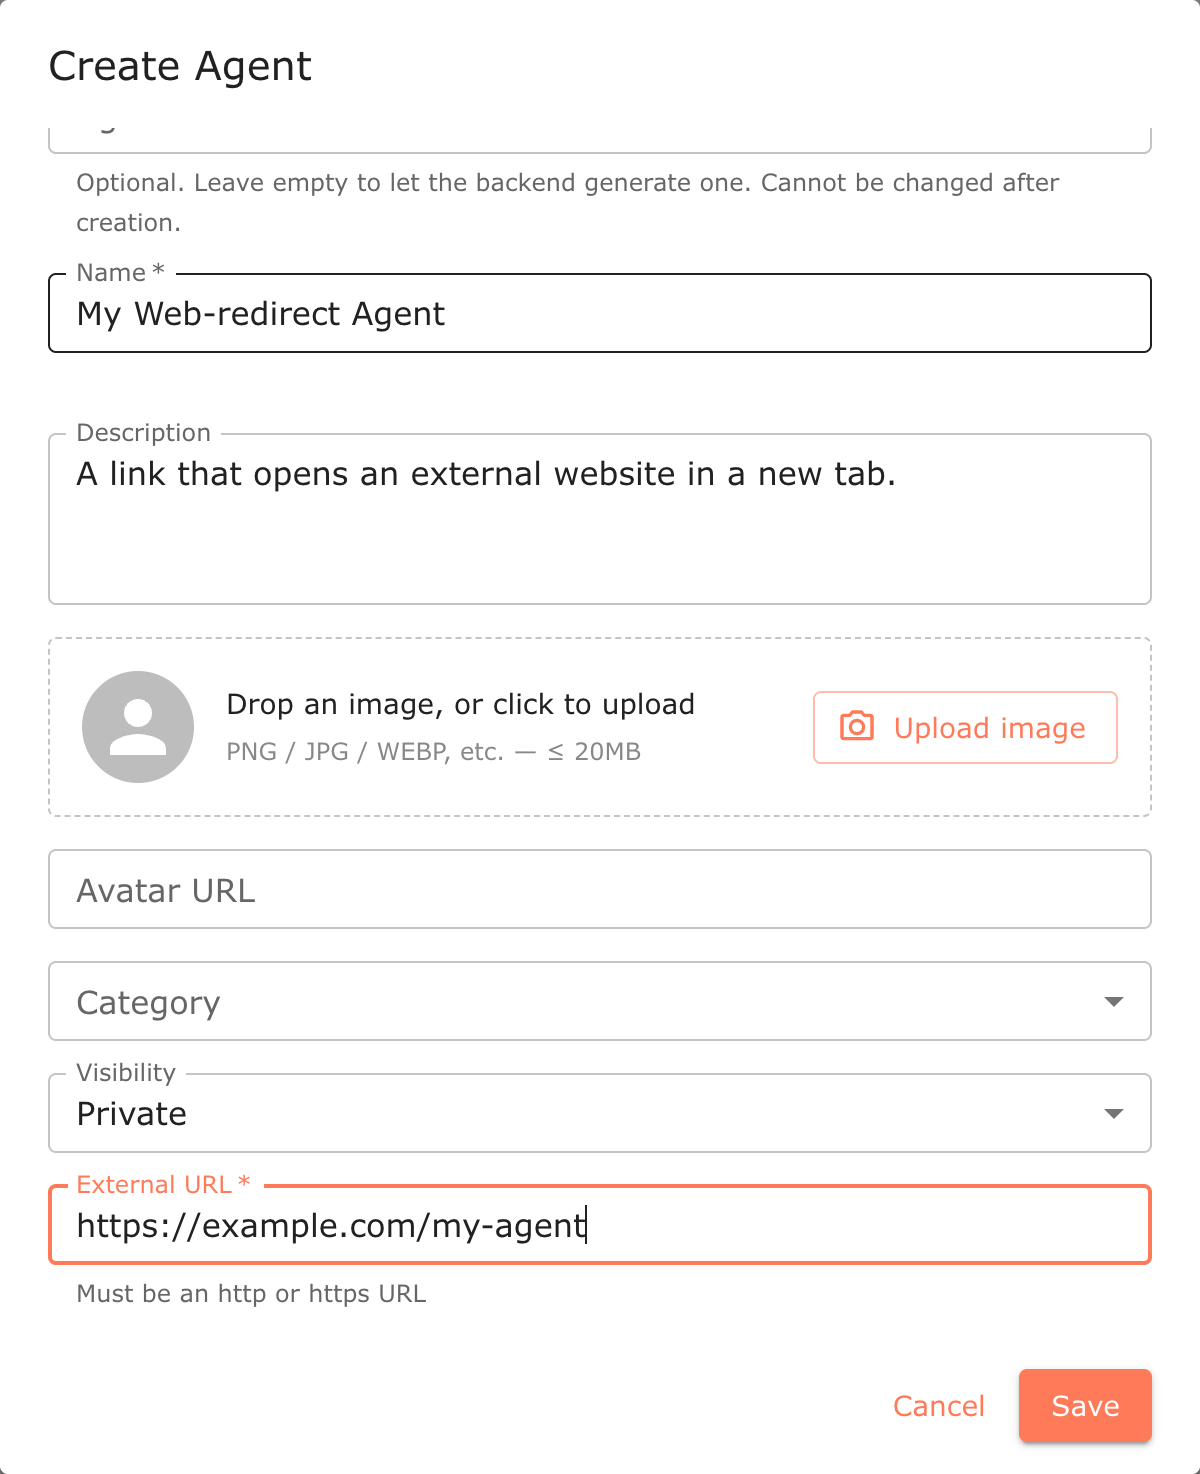
In Admin Console → Agents, click Create Agent and switch the Agent type to Web-redirect Agent (shared fields: Section 6.1).
| Field | Required | What it does |
|---|---|---|
| External URL | Yes | The website to open when the agent is clicked. Must be a valid http or https URL. |
Click Save. The agent appears in the list with an External type badge.
4.2 Use it
From the portal, click the agent (or its Enter button). Instead of a chat page, your browser opens the configured External URL.
5. Use case 3 — Use local compute through the cloud (edge agent)
This use case bridges two systems: an agent built on the cloud AgentWeave platform is served by your local deployment. Users chat with it on the cloud, but the request is tunneled down to your local deployment, which runs the model and returns the answer. The cloud only relays the conversation — the agent and the compute are yours, locally.
5.1 How it works
You generate a key on the cloud that identifies a specific cloud agent, then paste it into your local agent's Cloud Agent Key field. The local deployment opens a secure edge tunnel to the cloud; from then on, cloud chats for that agent are routed down the tunnel to your local runtime.
Operator note. The edge tunnel requires the deployment to know where the cloud is (the
EDGE_TUNNEL_ENABLED,EDGE_WS_BASE, andEDGE_REST_BASEenvironment values). These are set once by whoever installed the deployment; the steps below assume the tunnel is available.
5.2 On the cloud: enable local direct connection and generate the key
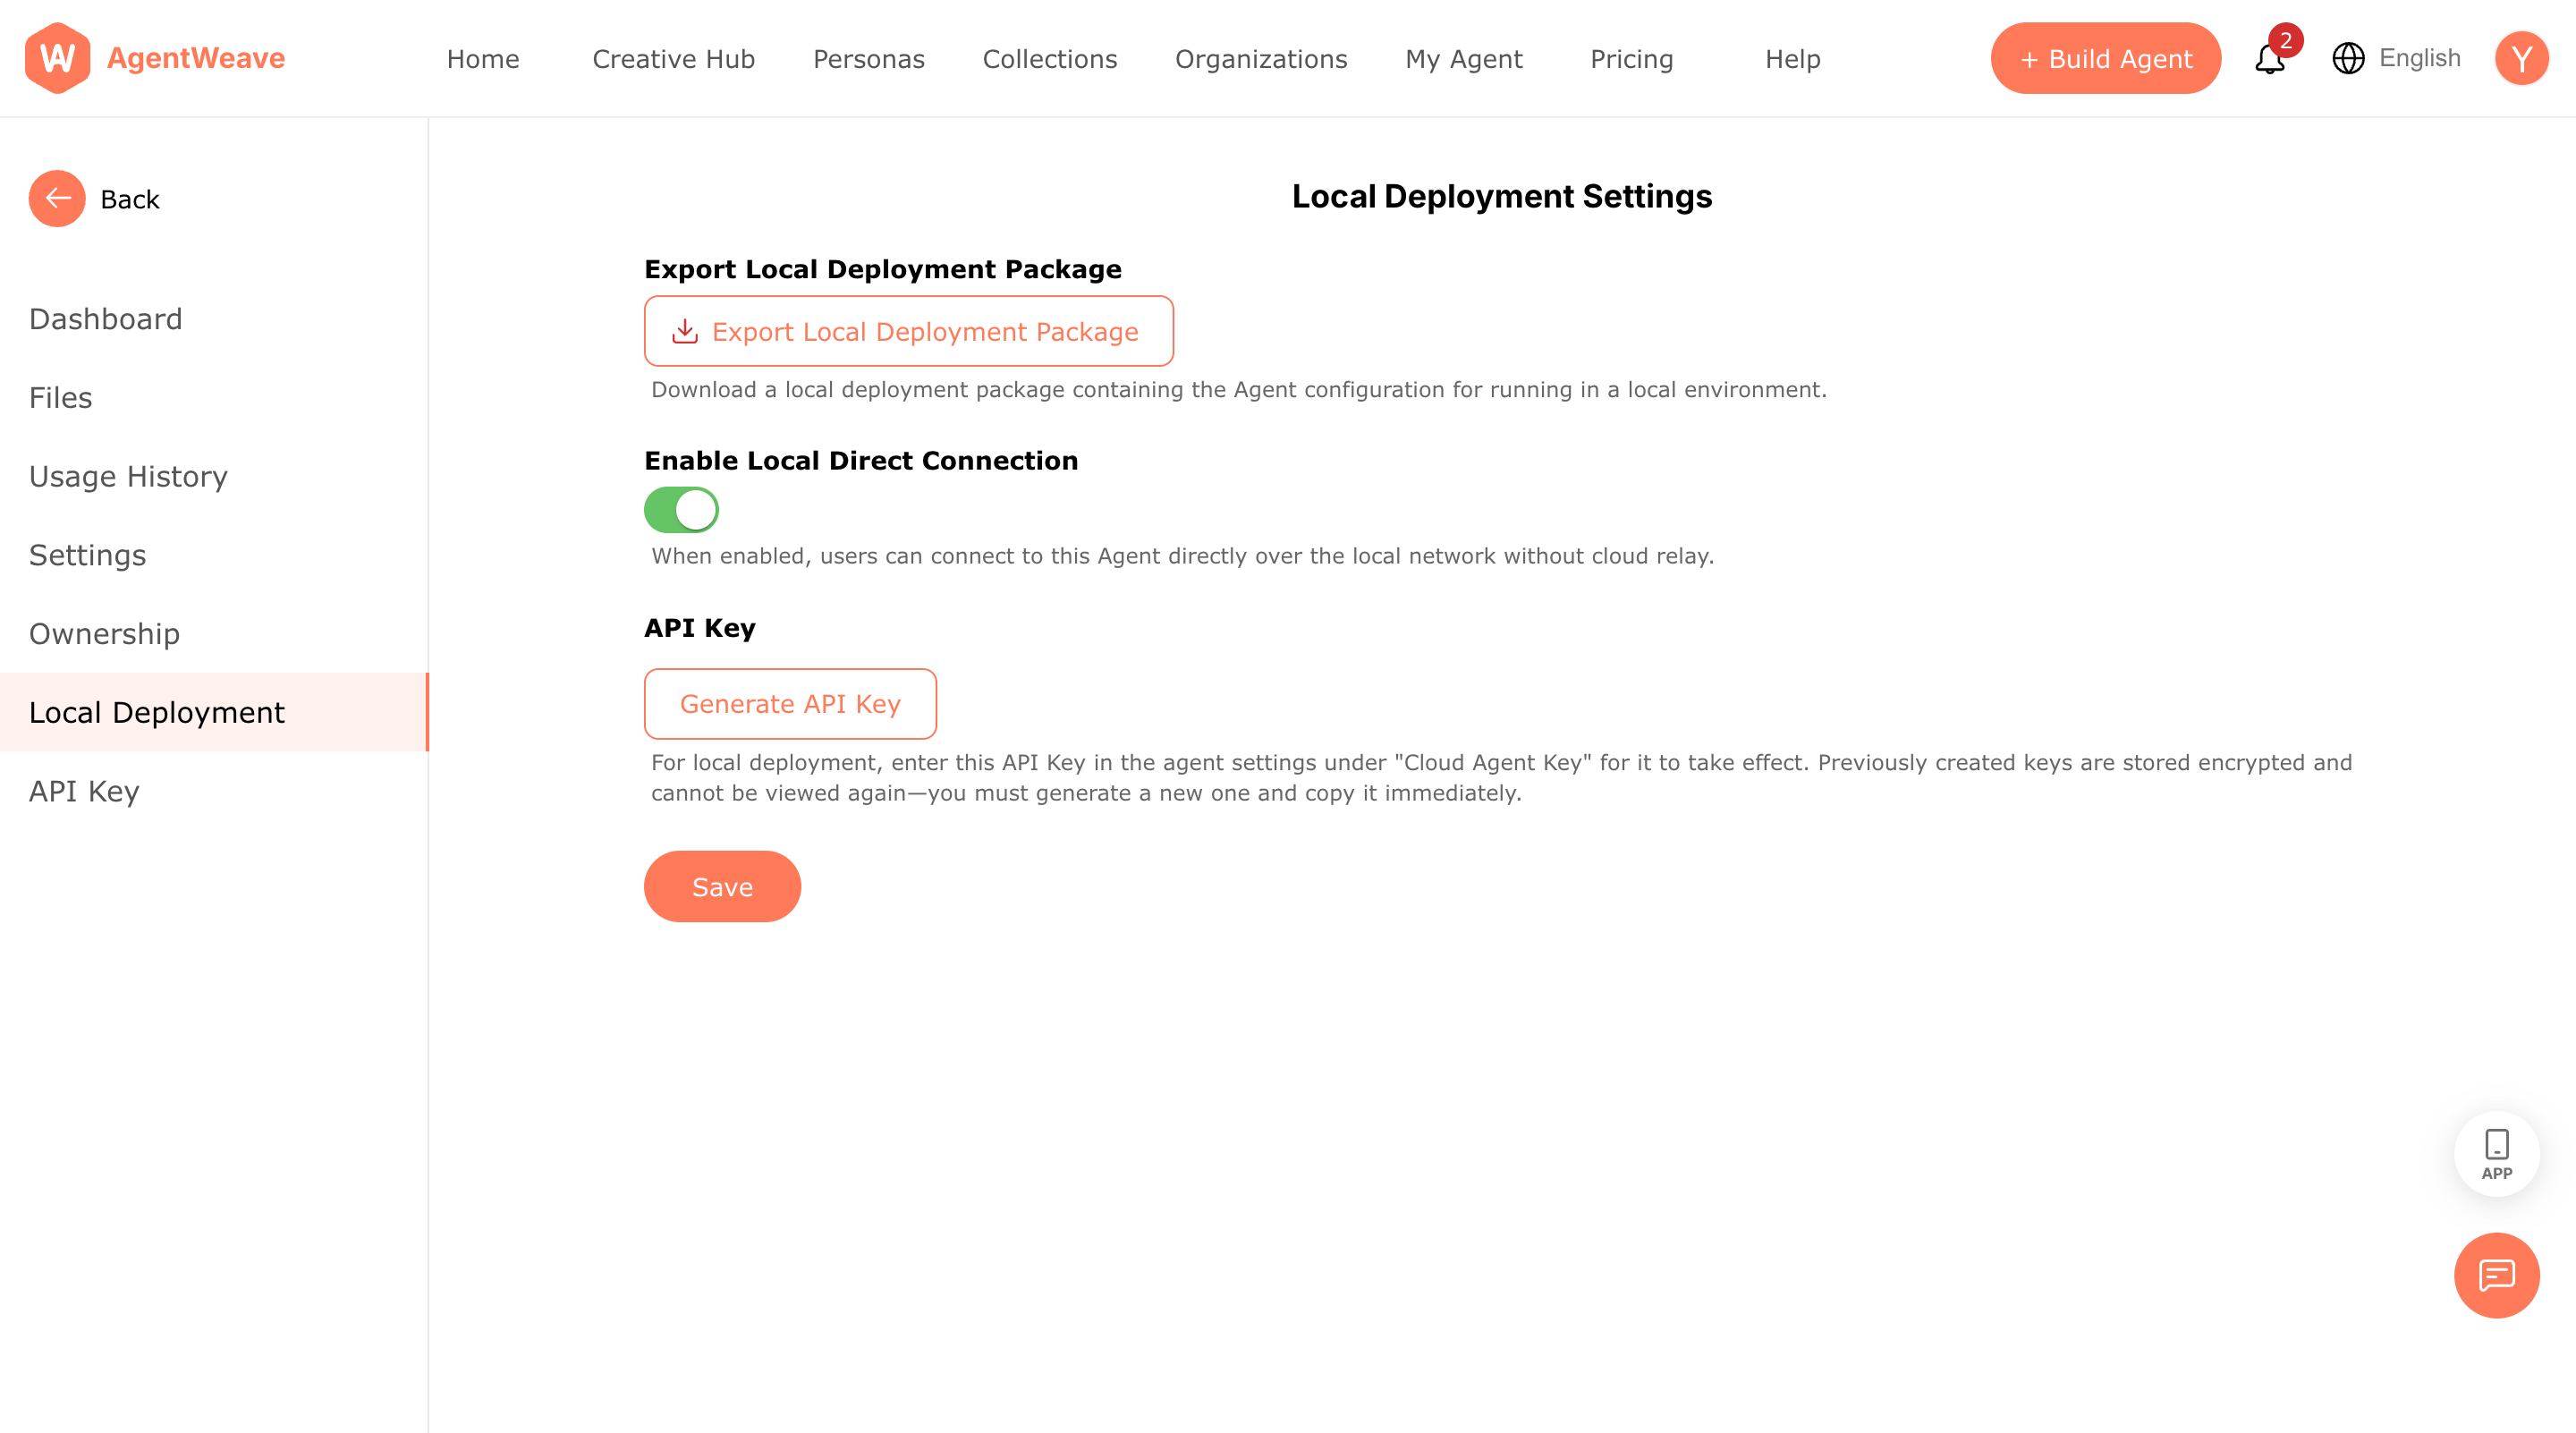
- Sign in to the cloud AgentWeave platform and open (or Build) the agent to bind. Cloud binding is supported by AgentCore-type agents.
- Open the agent's Manage page → Local Deployment tab.
- Turn on Enable Local Direct Connection and click Save.
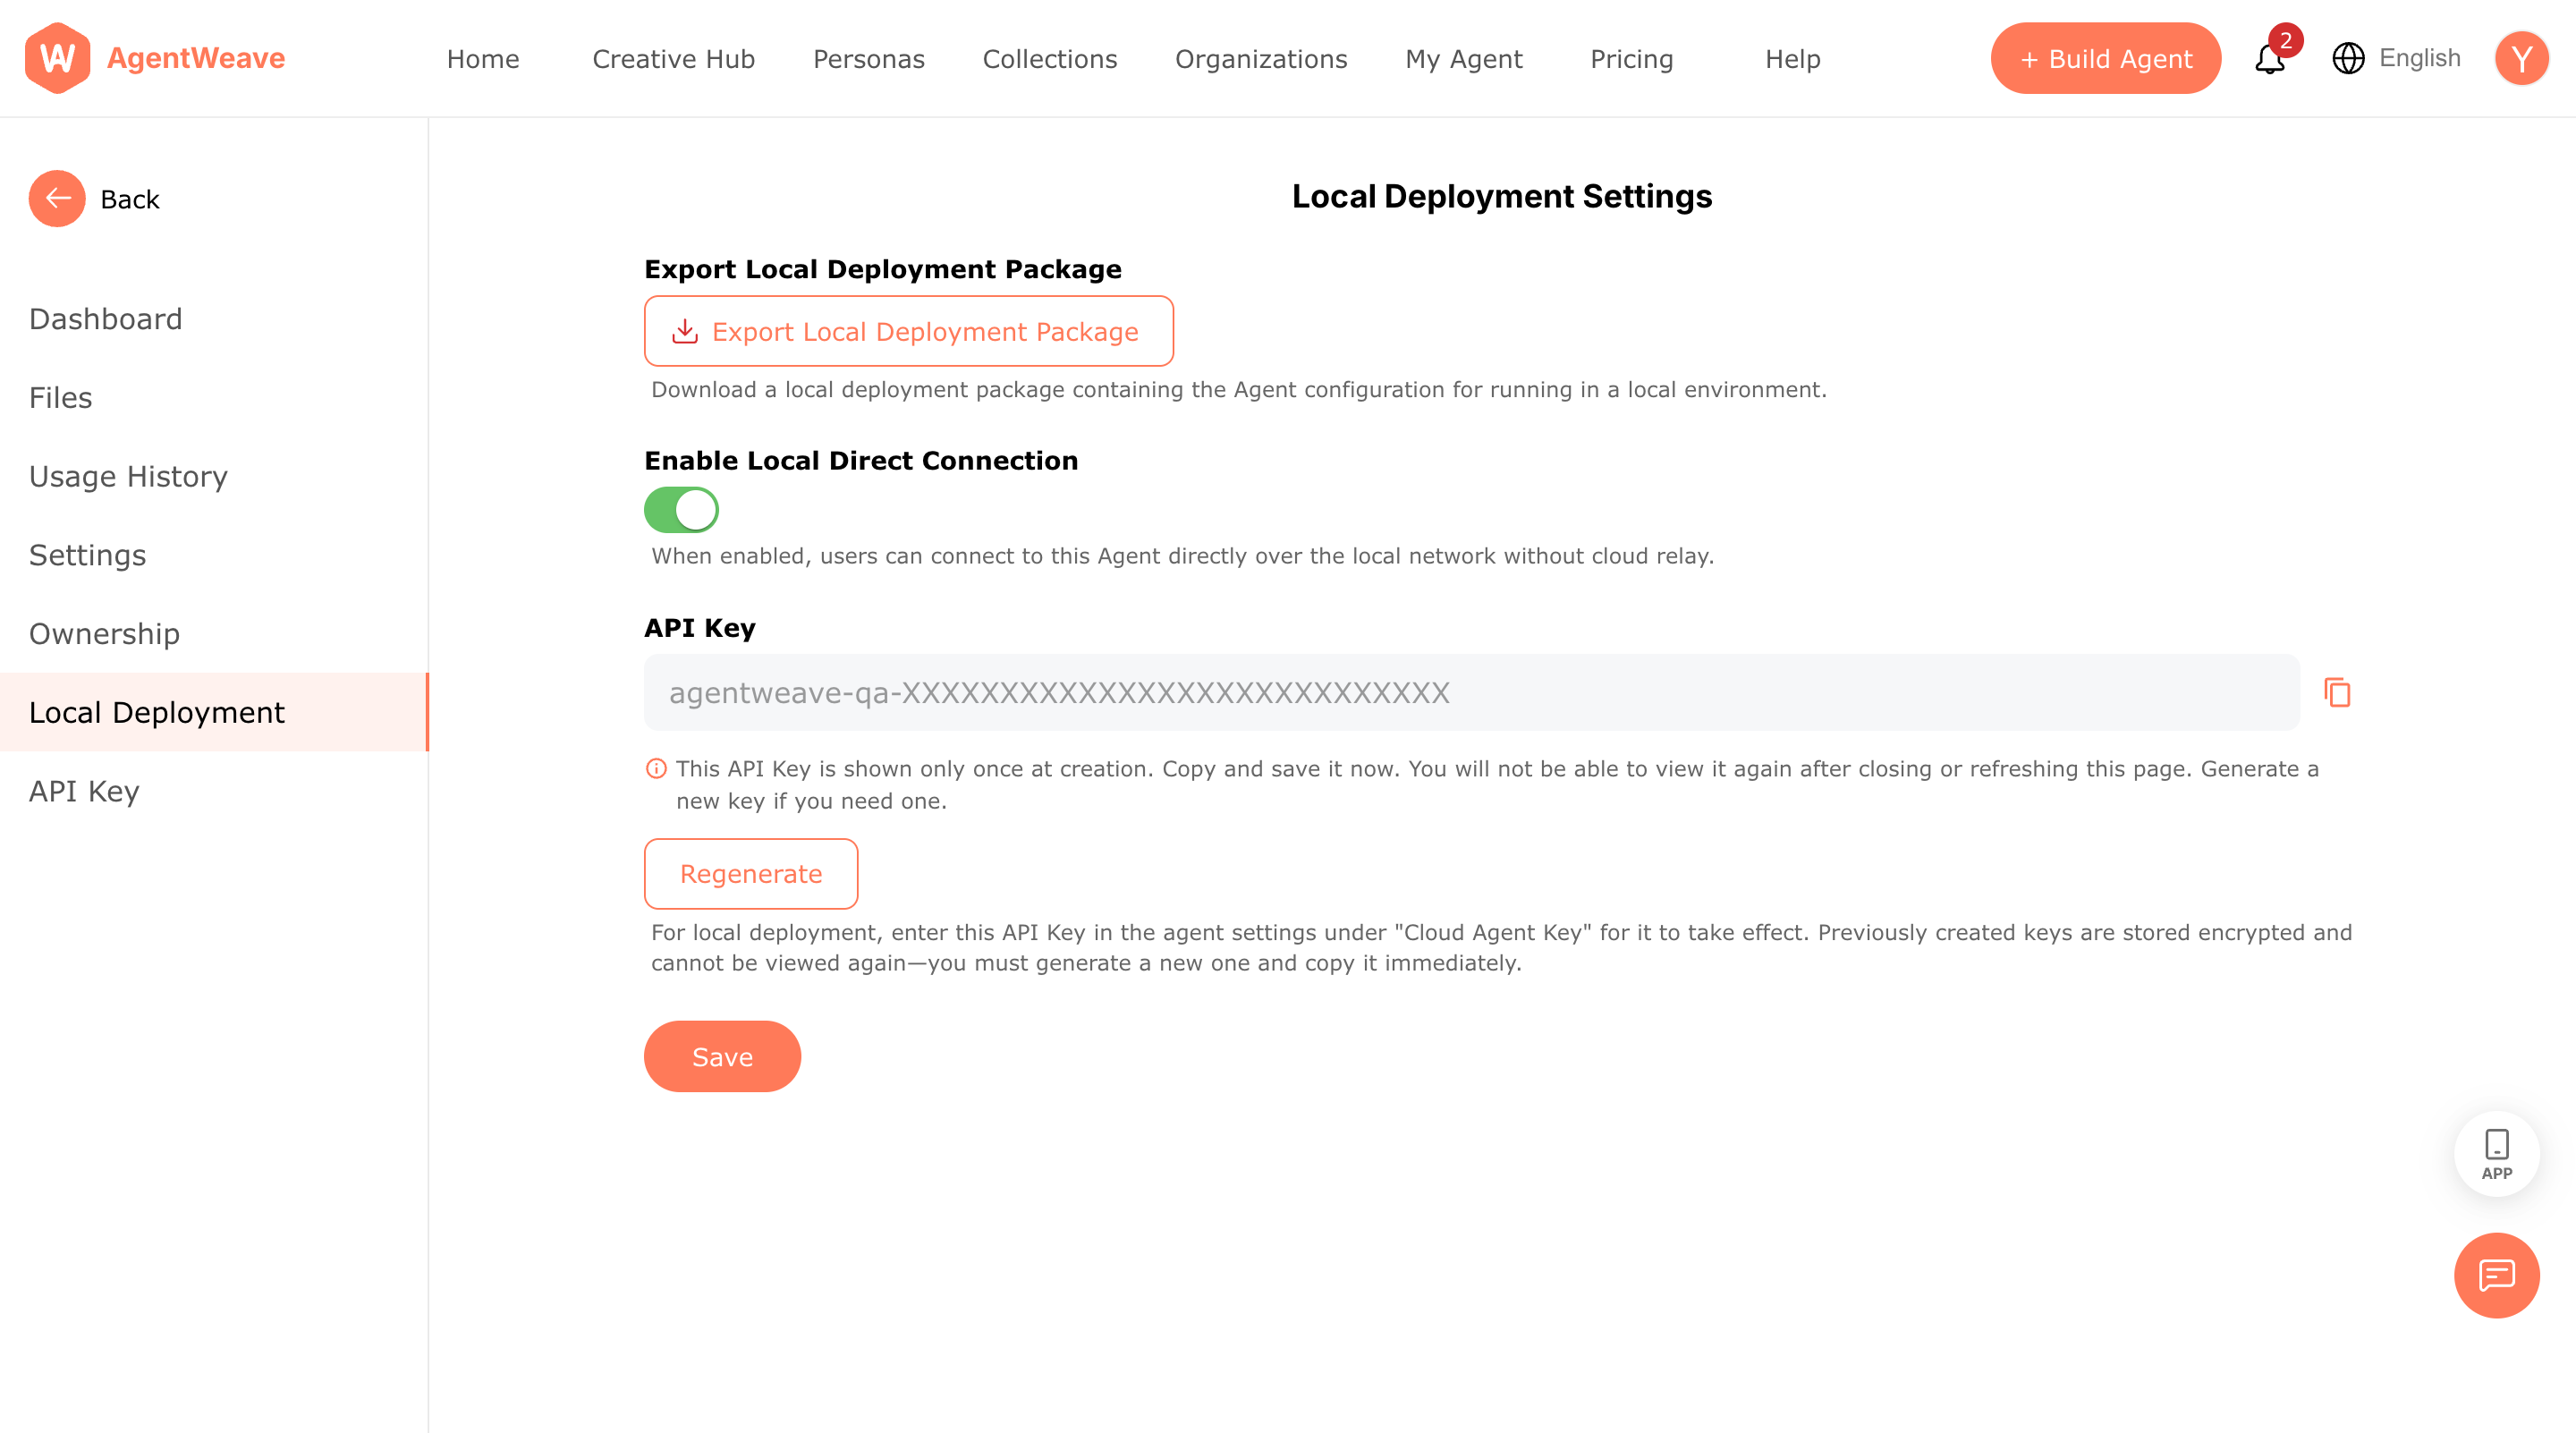
- Click Generate API Key. The key (prefixed
agentweave-…) is shown only once — copy it immediately. Use Regenerate if you lose it.
5.3 Export and import the agent
On the same Local Deployment tab, click Export Local Deployment Package to download a .zip of the agent's configuration. Then, in your local deployment's Admin Console → Agents, click Import Agent, choose the .zip, and import it (same flow as Section 3.1). It appears as an Imported agent and runs on your local runtime — no Service URL needed.
5.4 Bind with the Cloud Agent Key
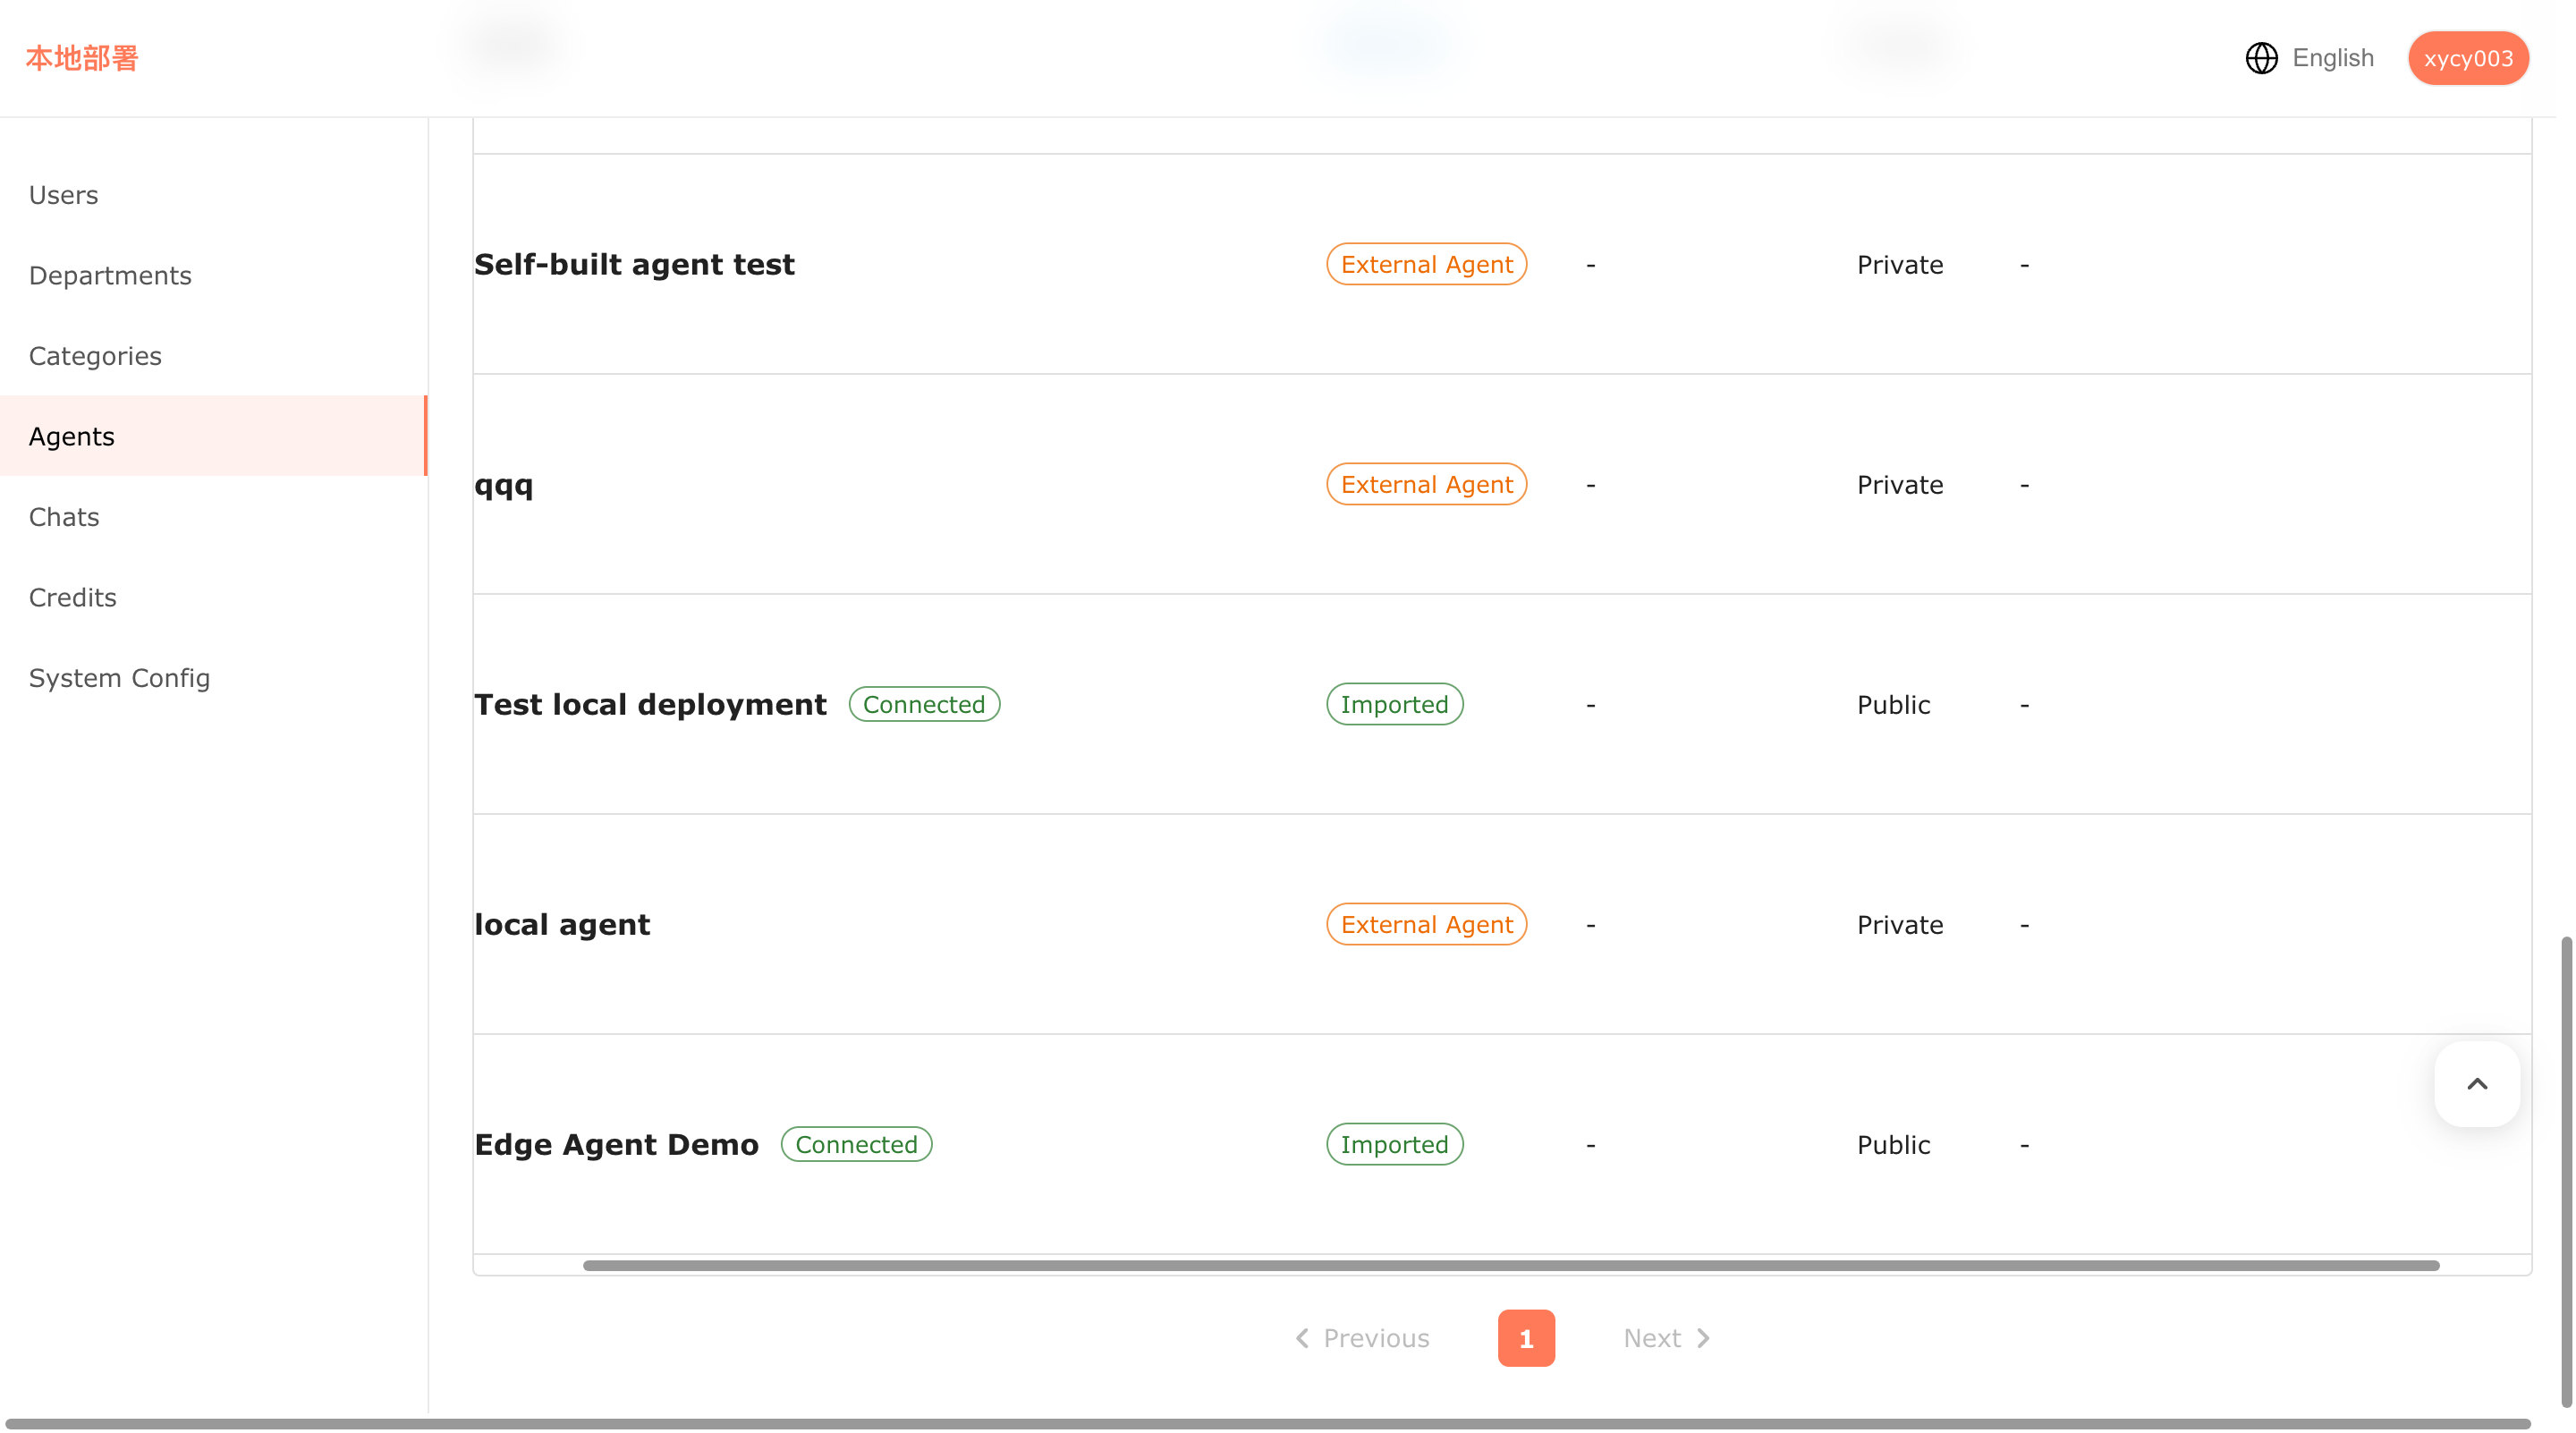
Click Edit on the imported agent, paste the API Key from Section 5.2 into Cloud Agent Key, and Save. Within a few seconds the agent's row shows a Connected badge — the edge tunnel is established.
5.5 Chat from the cloud, served by local compute
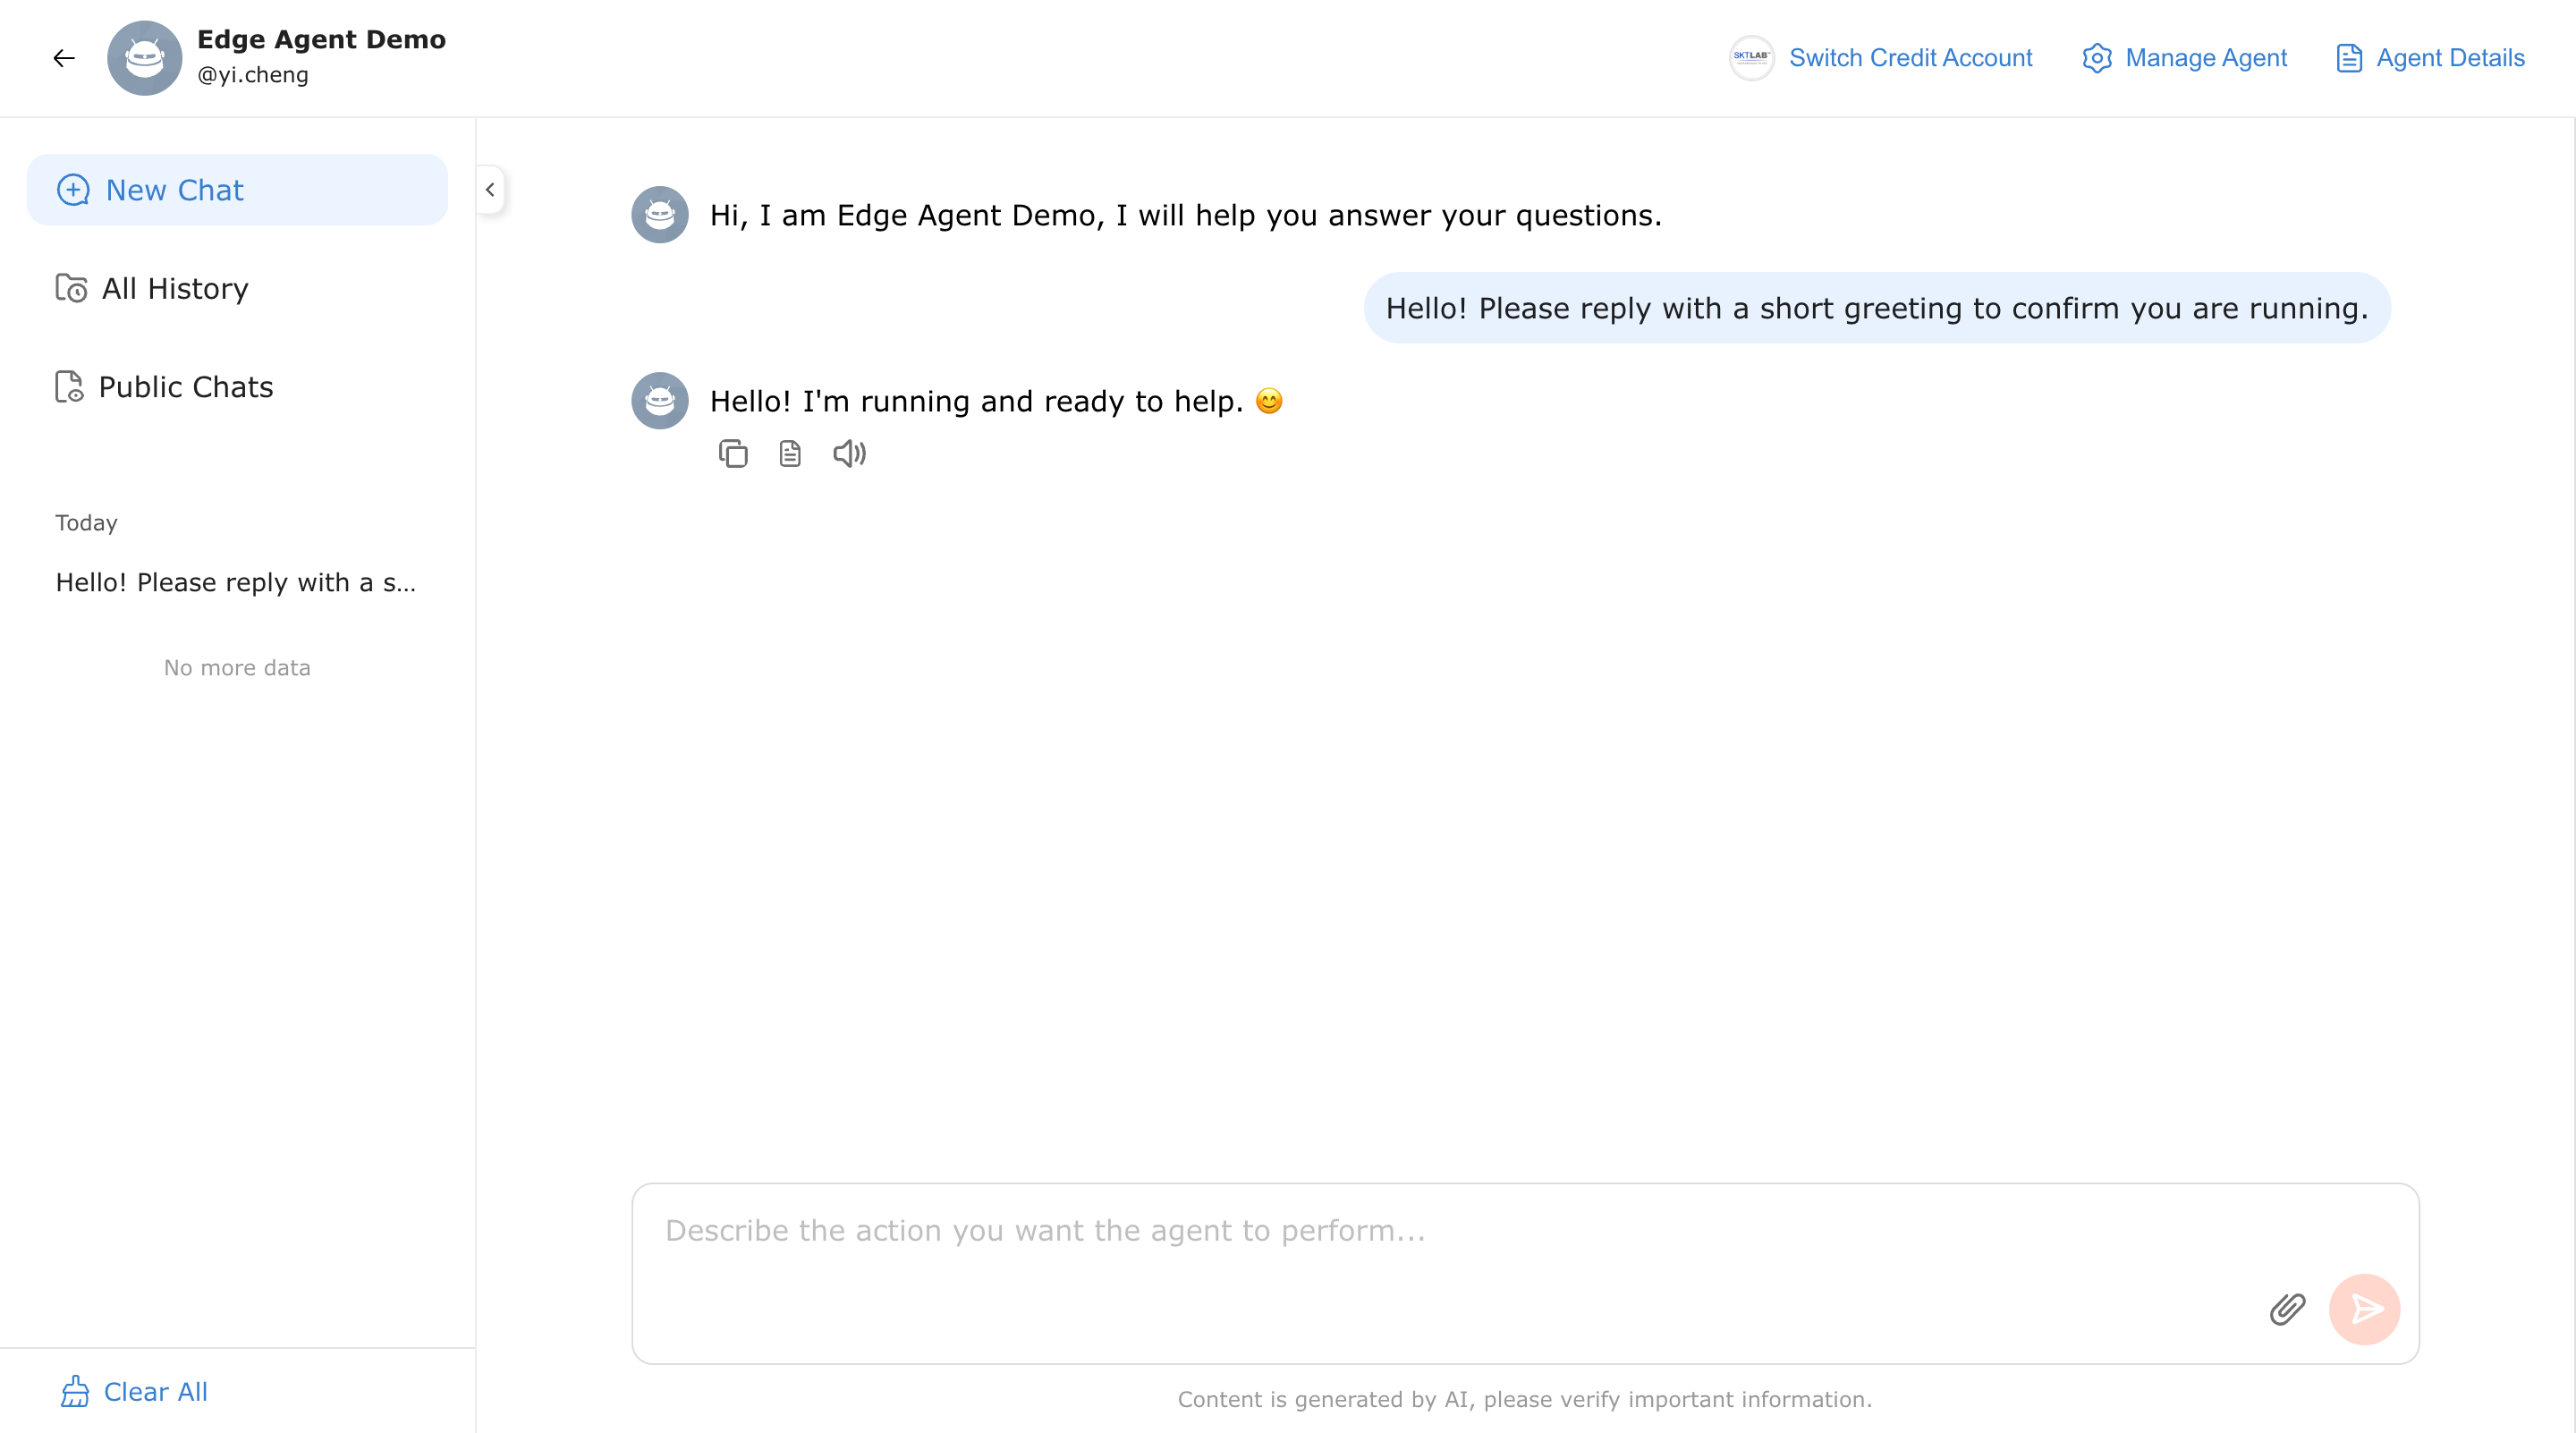
Back on the cloud platform, open the agent and send a message. You get a normal reply in the cloud chat — but the request was routed down the edge tunnel to your local deployment, which ran the model and produced the answer. You are now using your local agent and local compute, with the cloud acting only as the chat front end.
Troubleshooting. If the cloud chat does not reach the local agent, confirm that Enable Local Direct Connection is saved on the cloud, the local agent's row shows Connected, and the local deployment can reach the cloud over the network.
6. Agent management reference
6.1 The Create Agent dialog
Admin Console → Agents → Create Agent opens one dialog for both external agent types. At the top, pick the Agent type:
- Self-hosted Agent (shows as
External Agent) — an OpenAI-compatible service you deploy yourself (Use case 1, §3.3, optionally cloud-bound in Use case 3). - Web-redirect Agent (shows as
External) — a link to an external site (Use case 2).
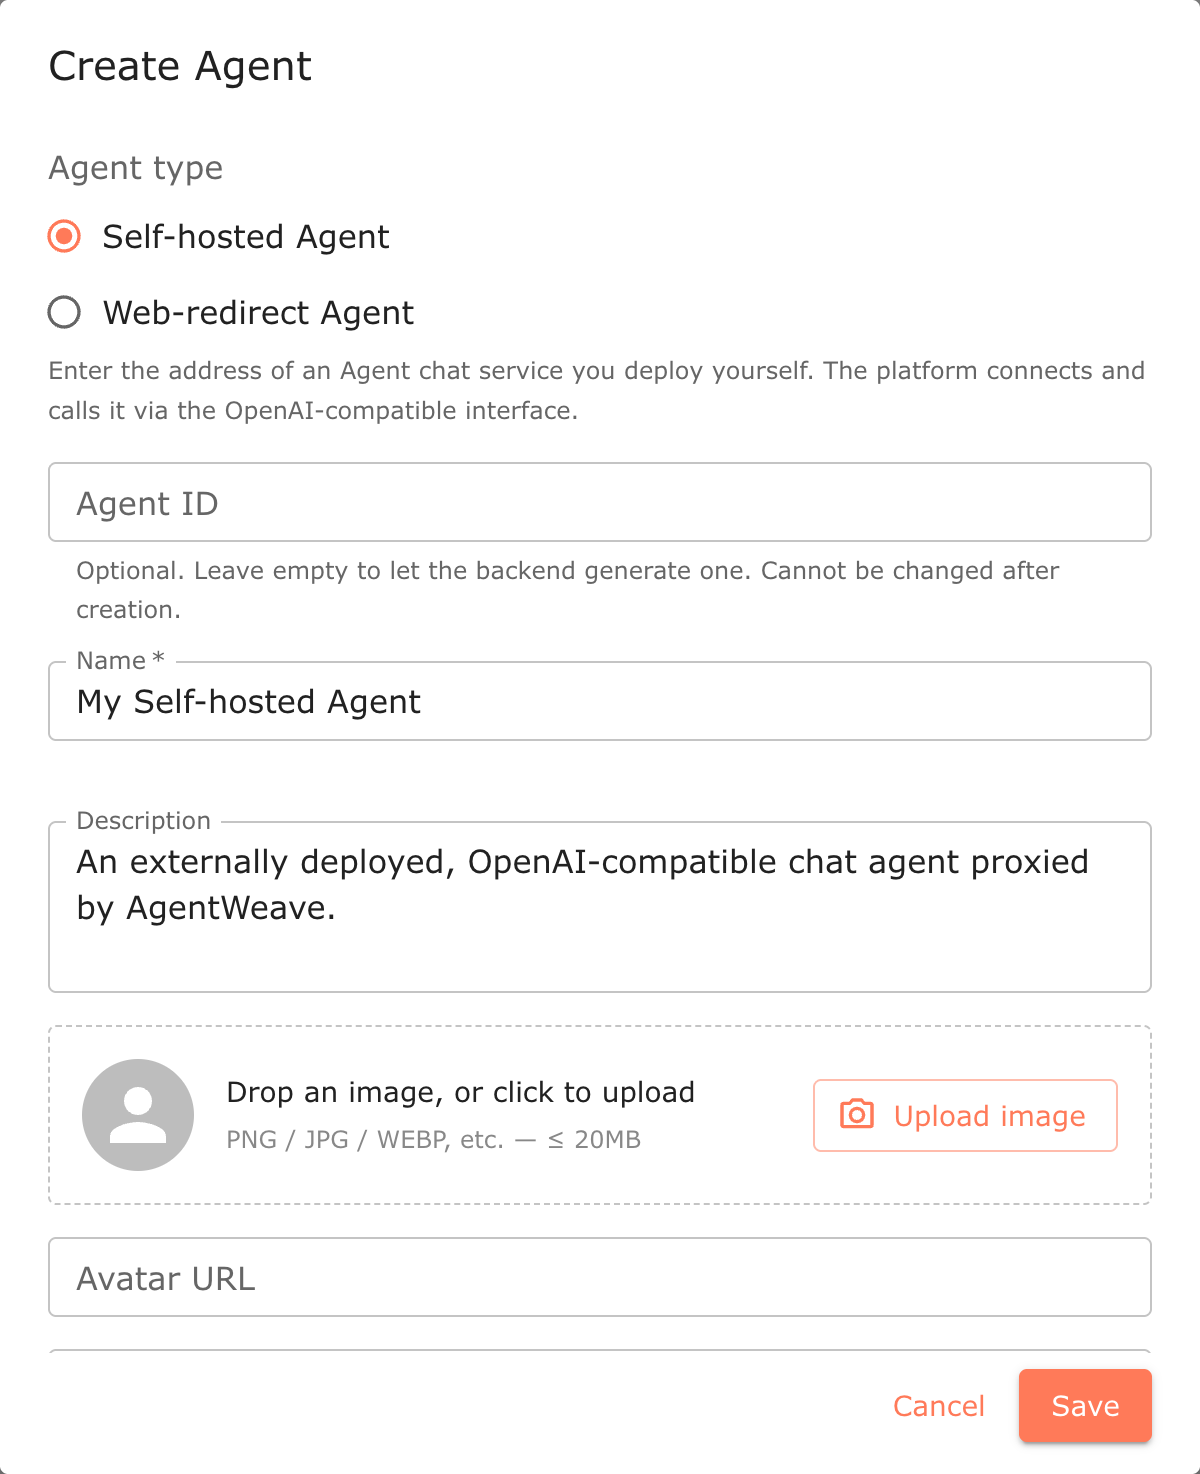
The fields common to both types:
| Field | Required | What it does |
|---|---|---|
| Agent ID | No | Unique identifier. Leave empty to auto-generate. Cannot be changed after creation. |
| Name | Yes | Display name in the portal and list. |
| Description | No | Shown on the agent card. |
| Avatar | No | Upload an image (PNG / JPG / WEBP, ≤ 20 MB) or paste an Avatar URL. |
| Category | No | Groups the agent under a portal category tab. |
| Visibility | No | Public, Private, or Hidden. Defaults to Private. |
The type-specific fields are documented in their use cases: Local service config and Cloud Agent Key in §3.3/§5, and External URL in §4.1.
6.2 Editing an agent
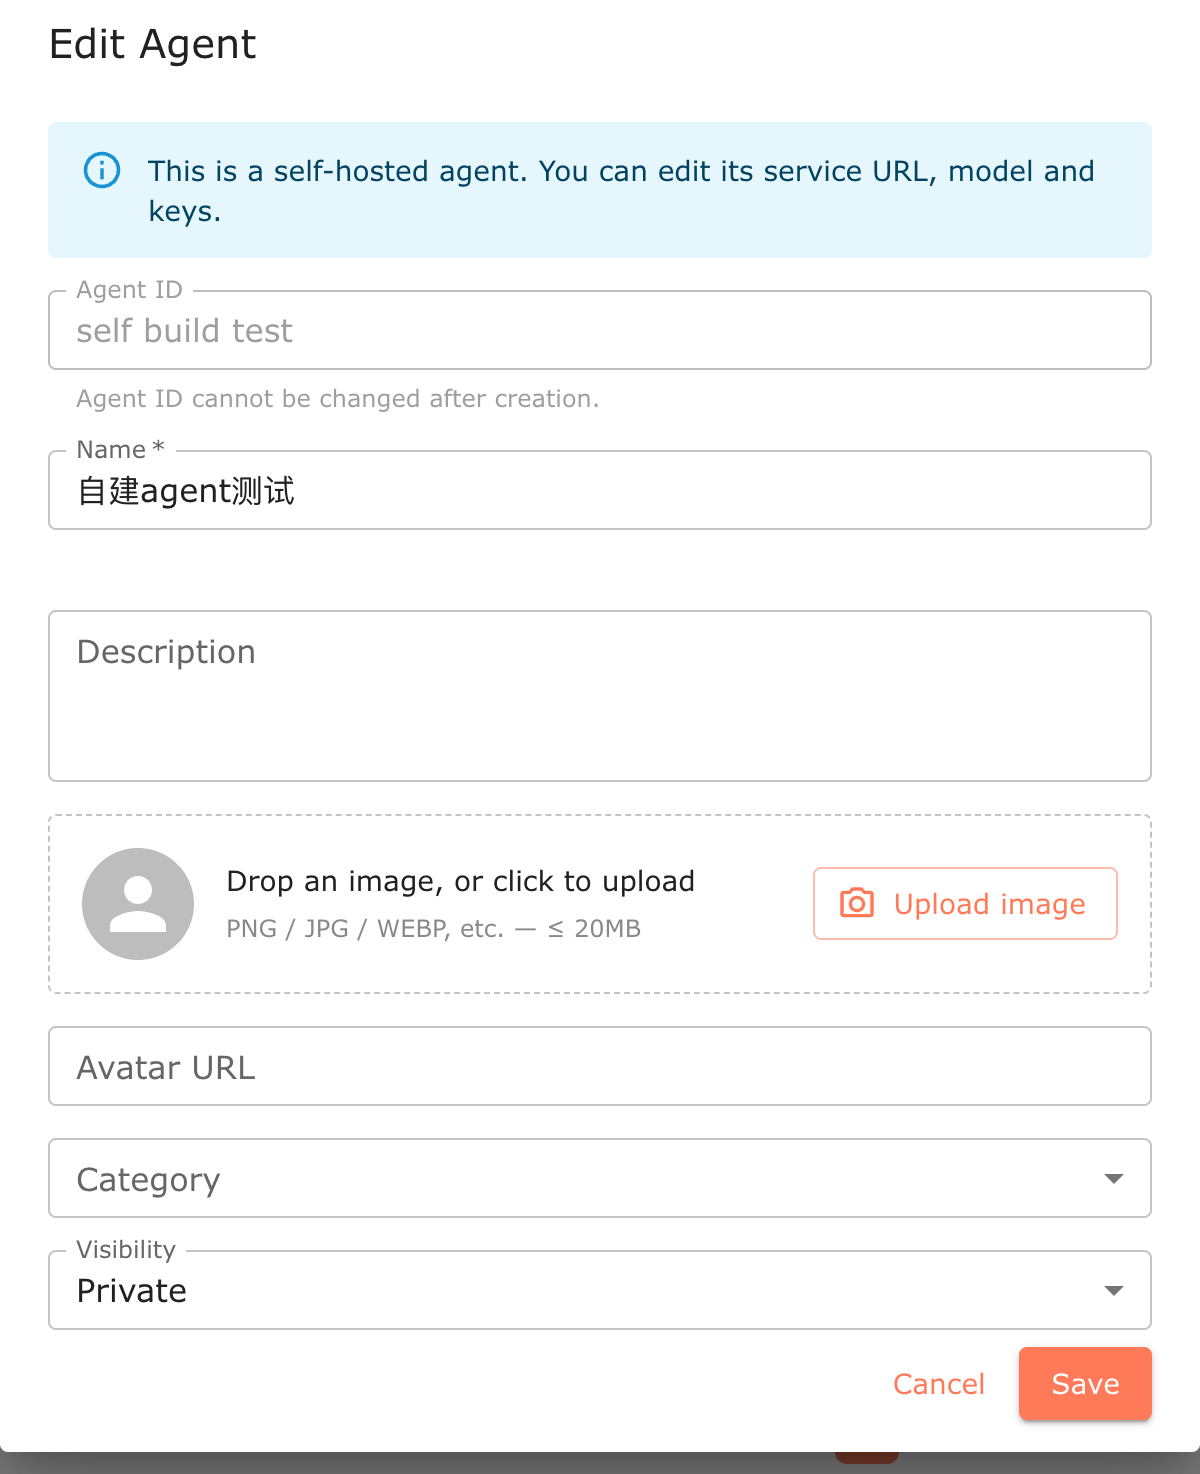
Click Edit on any row to reopen the form. A banner reminds you which kind of agent it is and what you can change; Agent ID becomes read-only, and edit mode adds a Sort Order field (leave empty to keep the current order).
6.3 Connection status badges
Agents bound to the cloud (with a Cloud Agent Key) show a live edge-tunnel status in the list:
- Connected — the tunnel is established.
- Connecting — the tunnel is being established.
- Disconnected — the tunnel is down (check the Cloud Agent Key, the cloud toggle, and network access to the cloud).
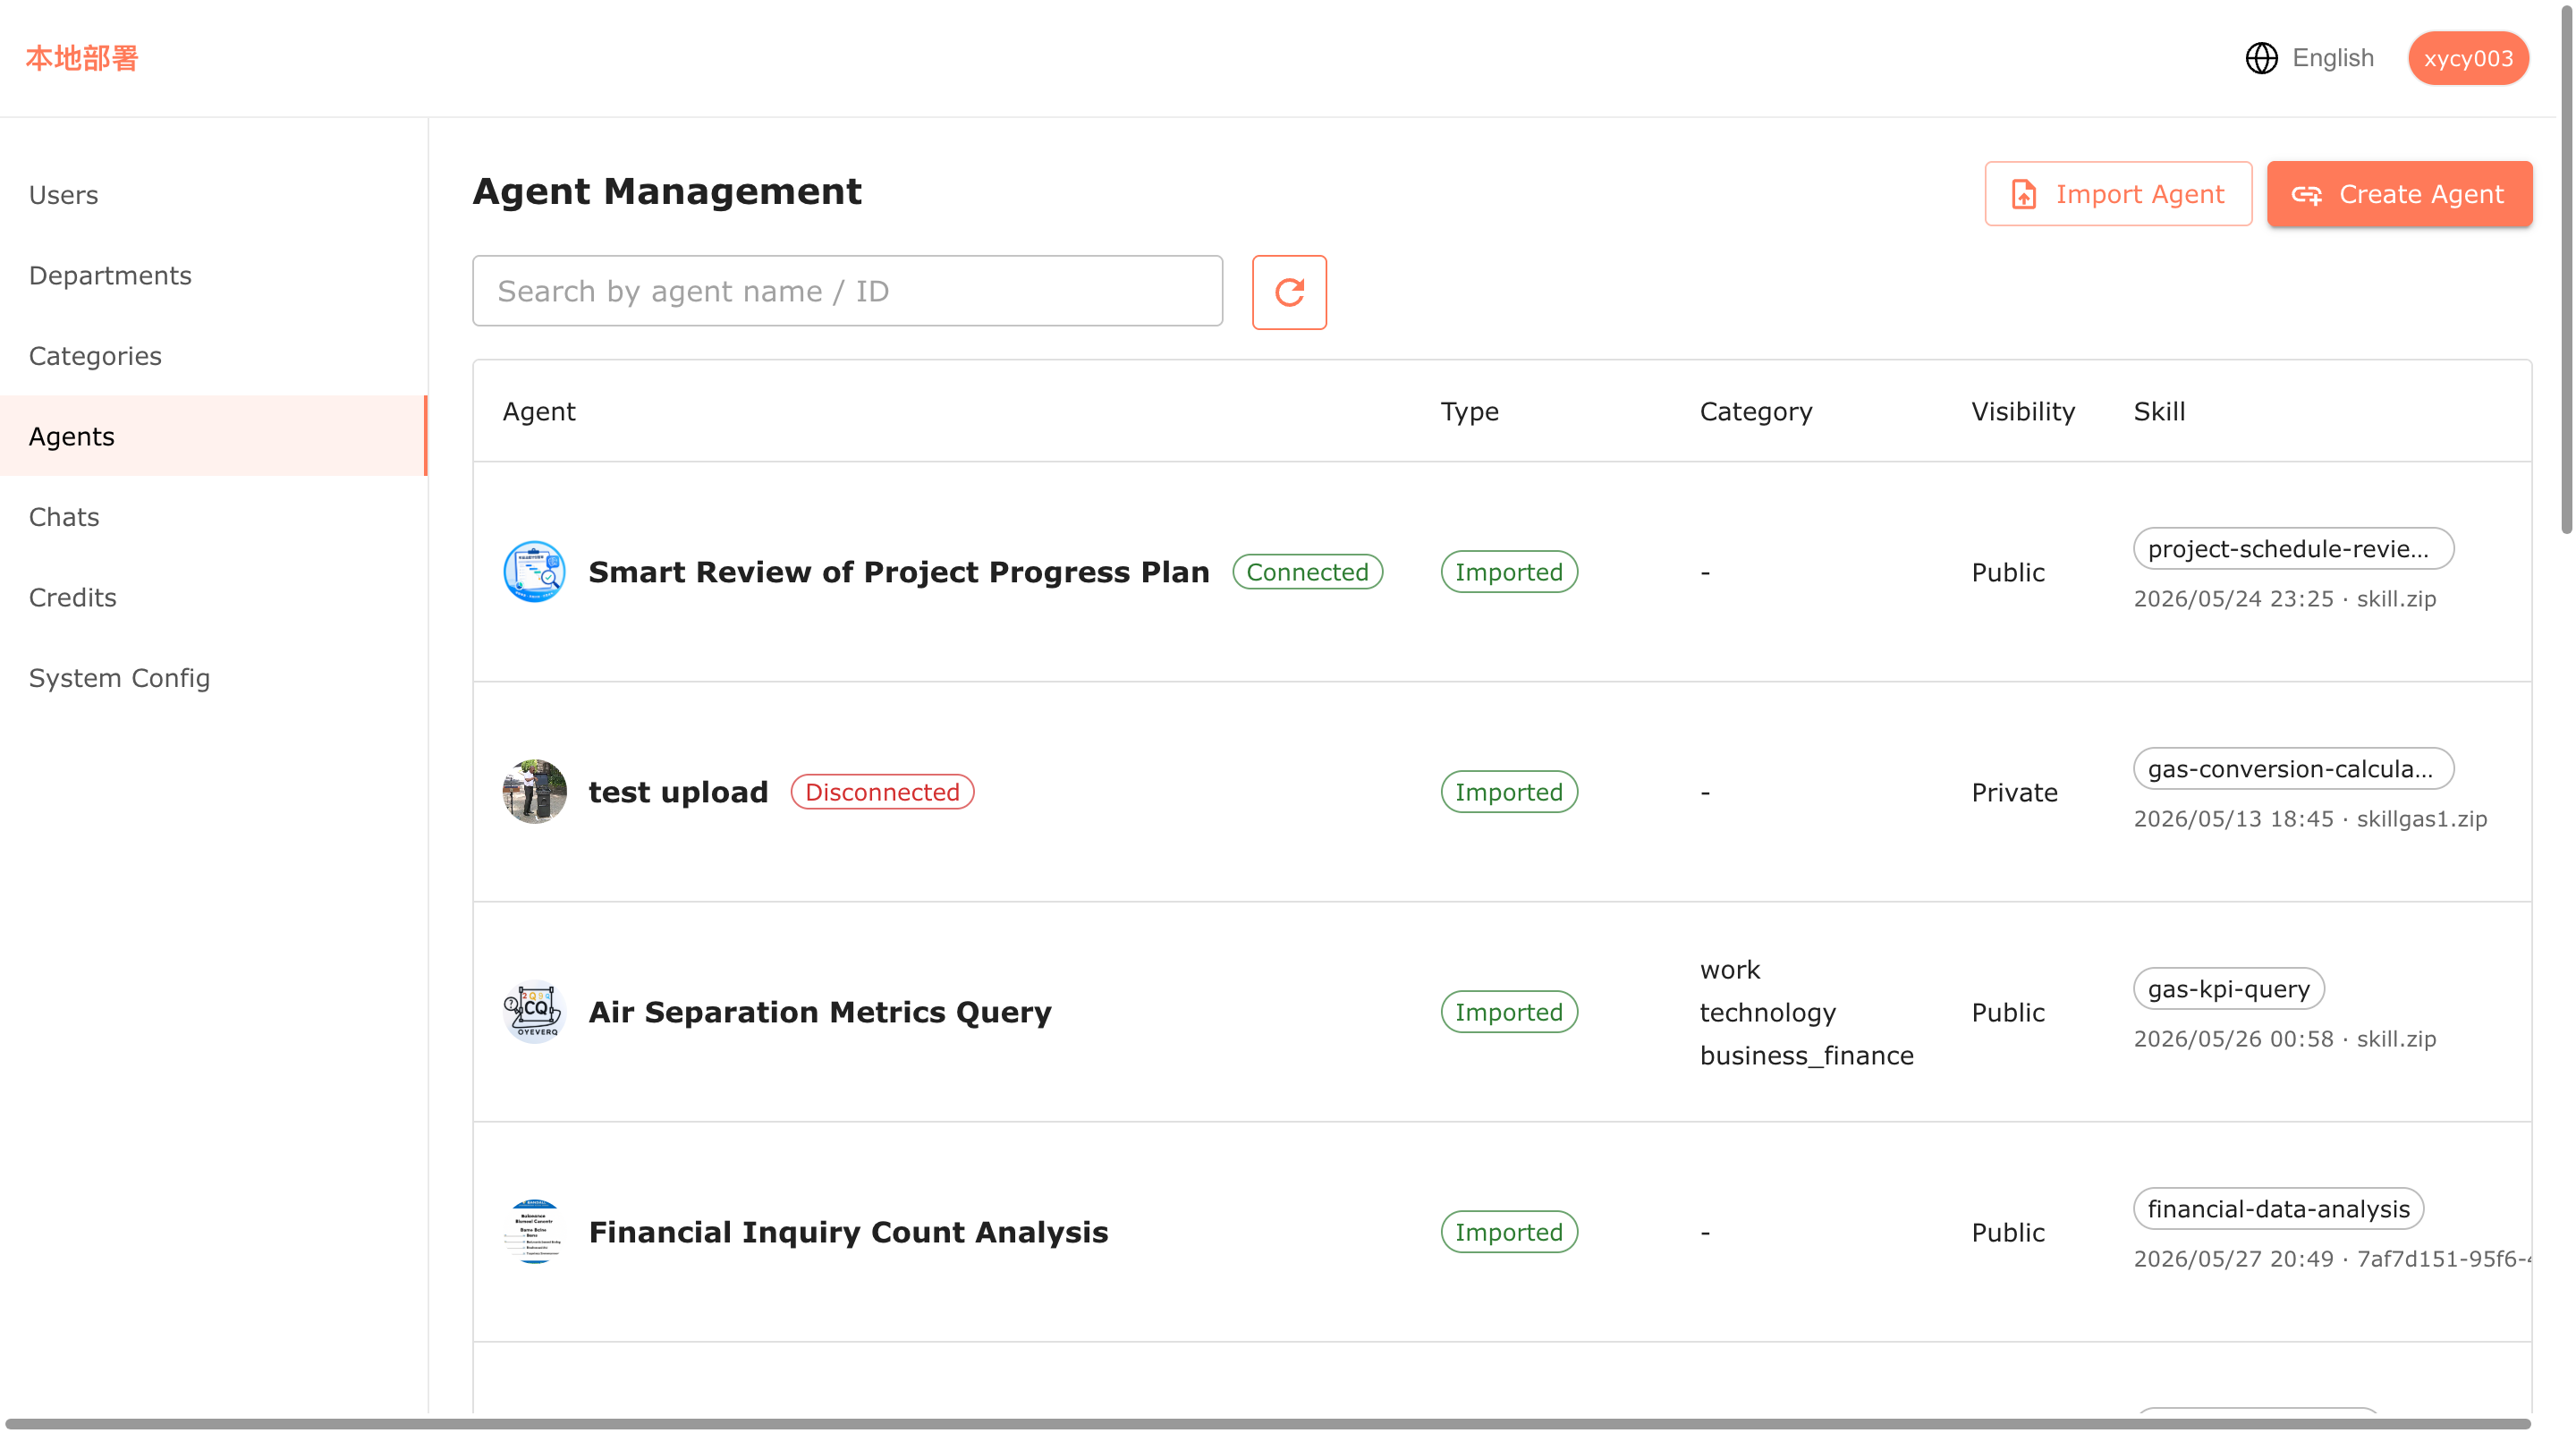
The status refreshes automatically; you can also click the refresh icon to re-check.